
I grew up in a household where bread, however abundant, was not typically served as an everyday accompaniment to dinner. Rolls were presented with special meals, but that was about it.


When I got married, though, my husband always liked having bread or rolls with his supper, so I got in the habit of including it on the evening menu. Of course, he doesn't like eating the insipid, tasteless, uniformly-sliced bread that comes from a plastic bag, so I've tried to supply good bread when I can, the kind that has at least a little more substance and flavor than the mass produced stuff. I usually buy a baguette or a nice loaf of Italian that might be on sale, but more and more lately I'm able to make something myself.

Anyway, I lucked out recently when I adapted a really basic recipe for Italian bread and tried it out on a new baking stone. It was alarmingly delicious, and fantastically golden. An unexpected home run, you might say. I think it's definitely worth sharing, so here it is!

About this recipe . . .
This formula assumes that you have a baking stone and a mixer with a dough hook, but if you don't, feel free to give this a whirl just using your hands for the mixing and kneading, and by using a baking sheet that's been covered with parchment, and the parchment dusted with cornmeal, instead of a baking stone.

Italian Bread, with Herb & Olive Oil Crust
(For a printable version of this recipe, click here!)
1 and 1/2 tsp. instant yeast (or, if you can't find instant yeast, use 1 pkg. active dry yeast and proof it first in 1 cup of the warm water)
3 cups warm water (between 105 and 115 degrees Fahrenheit)
1 Tbsp. kosher salt
2 cups bread flour
4 to 5 cups unbleached All-Purpose flour, plus more for the work surface
Cornmeal (about half a cup should be enough, or extra flour can be used if you don't have cornmeal)
To brush on top of the raw and baked loaves:
1/3 cup olive oil
1/2 tsp. dried oregano
1/2 tsp. dried basil
1/2 tsp. dried parsley
1/4 tsp. kosher salt
1 garlic clove, peeled and finely minced
In a bowl with the 3 cups warm water, dissolve 1 Tbsp. kosher salt. Pour this into a large mixer bowl.
Add the instant yeast, 2 cups of bread flour, and 3 cups of the AP flour into the bowl. Using the paddle attachment, mix on low speed for a couple of minutes to combine.

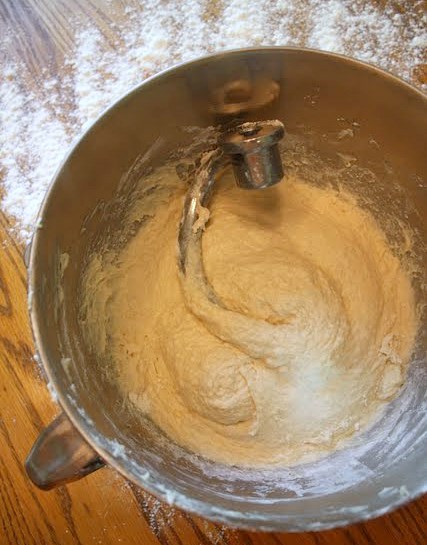
Stop the mixer, scrape the bottom of the bowl with a spatula, and switch to the dough hook. On low speed, add in 1 to 2 more cups of AP flour gradually, about 1/2 a cup at a time. Keep mixing until a cohesive dough begins to form, about 4 minutes. (It will be relatively loose and still kind of wet at this point, but it shouldn't be as soft as a thick liquid, if that's any help!)
On a generously floured work surface, dump out the dough. For about 4 minutes, knead the dough firmly but gently by hand. It's okay to incorporate more flour as needed to keep it from sticking to your work surface at this point, but remember that this is meant to be a pretty soft dough. Once the dough is relatively smooth, place it into a large bowl that's been sprayed with vegetable spray, lightly oiled, or greased. Turn the dough over completely in the bowl, just once, so the bottom and top of the dough are both lightly coated.


Lightly cover the top of the bowl with a piece of plastic wrap that's also been sprayed with vegetable oil, then cover the plastic loosely with a dish towel. Place the covered bowl in a warm place that's free from drafts. Let the dough rise until it's doubled in bulk. This will probably take at least an hour.

Gently dump the doubled dough out onto a lightly floured board (don't use too much flour at this point if you can help it; just enough to prevent sticking) and knead it for 5 more minutes.


Gently dump the risen halves out onto a very, very lightly floured work surface and separate them. (The less extra flour you use now the better. Flour that gets incorporated into the dough at this point can leave ugly grayish streaks in the finished loaves.) One at a time, using your hands, shape each dough piece into a typical, Italian bread-style, oblong loaf. Gently lift and place each shaped loaf onto a completely flat wooden cutting board that's been heavily coated with cornmeal; this will function as your baker's peel. (Or, if you do have a baker's peel, use that.)

The cornmeal is what allows the loaves to slide onto the baking stone. Don't place the loaves too close together! Cover the loaves, on the board/peel, with the sprayed plastic wrap and the dish towel. Let them rise one last time in a warm place, until almost doubled (about 30 minutes).
About 30 minutes before you'll be baking, put your baking stone on the bottom rack of your oven, and set the oven to 500 degrees to preheat (yes, I said 500; when the loaves have risen and you're finally ready to place them in the oven, you'll immediately turn it down to 375 degrees.)
In a small bowl, mix together the olive oil, dried herbs, minced garlic, and salt. Have a pastry brush ready.

Once the loaves have risen, carefully score (aka slash) the tops with the edge of a sharp razor blade or a baker's lame (the lame is that little contraption pictured below, with the green handle; it's pronounced like the word "Tom").

This helps prevent the loaves from bursting haphazardly in the oven. Try not to score too deeply or you may deflate the loaves. Brush the loaves with the herb oil, but only use half of it because you'll need to brush them again a few minutes after they're baked.


A couple of minutes before you're ready to slide the loaves onto the baking stone, take a spritz bottle of warm water and quickly open the oven door. Squirt the mist into the oven about six times; do not aim at the baking stone. Quickly shut the door.
When you are actually ready to put the loaves onto the stone, open the door again, swiftly slide the loaves onto the stone with a quick jerk of the board/peel, and again squirt the warm water mist into the oven, above the loaves, about six times. Quickly shut the door, and immediately turn the temperature down to 375 degrees. Don't open the oven again for at least 15 minutes.
The loaves are done when they are golden brown all over, and their internal temperature is about 200 to 210 degrees. Mine baked about 35 minutes, and I tested the interior with a stem thermometer that I poked into the side.

After the loaves are done, place them on a cooling rack, and after a few minutes brush them again with the herb olive oil mixture.

This coating will be absorbed into the warm crust quickly, and it really helps make the bread what it is. But if you'd prefer to skip this second coating, go ahead. In any case, enjoy!

Recipe full disclosure! I adapted this recipe from one that came with my Old Stone Oven Kitchen Supply brand baking stone. I changed the recipe by using part bread flour instead of all All Purpose flour, by using instant yeast vs. active dry yeast, by using kosher vs. regular salt, and by adding the olive oil and herbs component. I also completely rewrote the directions, adding in a lot of my own advice.
If you'd like to comment on this post, or to read any existing comments, just click on the purple COMMENTS below!


41 comments:
I think this will go really well with my osso bucco tonight. Got to go I've got baking to do. Thanks!!
Oh wow, this sounds like an amazing bread I can only imagine the aroma while it was baking! YUM!
Awesome looking bread! You make me feel like baking bread this very moment! I am still afraid to make savory bread after my one time baguette failure..lol!..but i have to try again esp. after looking at yours! Delicious!
oh wow this looks delicious! Simply perfect :)
Wonderful post. Great photos, clear instruction and wonderful recipe. Good job!
Cheers!
This looks so delicious! I can only imagine how yummy it SMELLS!
You're welcome, Marcellina--
Hope your osso bucco turned out great (that's one thing I've never attempted!).
:) Jane
Thanks, Daydreamer! Yes, it does fill the house with a fabulous fragrance.
:) Jane
Hi Faithy,
I know what you mean. It's taken me quite a while to be unafraid of making yeast bread. Now, though, I think I'm able to approach it more like any other recipe, with an attitude of experimentation--"if it bombs, so what, I'll try again, etc.!"
Warmly,
Jane :)
Hi there Snooky,
Thanks so much!
:) --Jane
Hi Lazaro,
Many thanks for those comments. So nice of you to visit! (Loved your blog's guest post from Stella of Witchy Kitchen!)
:) Jane
Hello Katrina,
Thanks so much! It does indeed fill the house with the glorious scent of garlic, herbs and, well, baking bread! ;) Yummy indeed!
Keep on baking,
Jane
Bread looks amazing! I was wondering what size mixer bowl you have- I am a bit leary about putting so much flour in my Kitchen Aid mixer- it's a 4.5 quart bowl. Thanks!
Hi Yael,
I have a 6 quart KitchenAid mixer. It can handle quite a bit of flour, luckily, but has to stay on the lowest speed for kneading bread dough with the hook.
Thanks!
:) Jane
Wow that looks AMAZING Jane! It's moved right to the top of my to do list!
I love to make bread and yeasty/sourdough goodies, to feel the dough in my hands. I've noticed that if I have a bad day there is nothing that comforts me more than kneading and "playing" with the dough. And in the end, the result could make such a big grining smile on my face that no matter what happened during the day, finally I'm the happiest person on the world.
Delicious. I must really try this. The crust looks amazing!
Is this recipe one that can be refrigerated before baking? I've been searching for a good, but easy, bread recipe that I could make over the weekend and stick in the fridge, to allow for fresh baked bread during the week.
It looks like it smells fabulous!
These are very handsome loaves of bread. I found your blog by chance and planned only to say hello and then move on. I was lured into reading your earlier posts and stayed much longer than I planned. I love your recipes and the general tone of your blog. I'll be back as often as I can. I hope you are having a wonderful day. Blessings...Mary
What gorgeous looking loaves of bread! I can almost smell them baking and it's making me go crazy. (I have a little bit of a bread addiction.)
Hi BakeYourHeartOut,
My apologies for not responding to your question sooner! I have never tried refrigerating this particular dough but I really see no reason why it wouldn't work. It is, after all, a pretty basic dough. In fact, I figure refrigerating it overnight might allow for more flavor development, just like with sourdoughs. I wouldn't hesitate to try it if I were you, and if you do try it, I'd love to hear how it works out. Let me know, okay?
Thanks very much,
:) Jane
Wow this bread looks really yummy! I must try it sometime. Love your blog!
Your blog is dangerous, I want to make everything! I'm definitely trying this bread this weekend. It sounds too good not to.
My hubby & I tried this recipe to make our first-ever homemade bread to pair with our homemade lasagna for Mother's Day tomorrow. We were certainly nervous & unsure of how it would turn-out. We just took our first loaf from the oven and it's perfect! Crusty & golden, fluffy & chewy... delicious! Thank you so much for your thorough, detailed recipe! We highly recommend this recipe for everyone wanting yummy homemade bread!
This looks delicious! Thanks for sharing!
I made two loaves for a visit from my mother in law, and both loaves were eaten by 4 adults within 24 hours! It was SO good! Thanks for sharing this unexpectedly fantastic recipe :)
hi Jane! - one of your newest students here =) thanks for sharing this recipe! i am really learning to bake from scratch - and so far, following your Italian Herb bread, it was definitely delicious! - fresh out of the oven, hot toasty crust! - however, i did not have a baking stone, so i used parchment paper and put a water bowl of water underneath .... it turned out really good (but it would be better with baking stone) - i will know more tomorrow morning! the bread should be great still! -- keep on baking!
Dear Baking Ghurl,
I'm thrilled to hear that you liked this recipe and that your bread turned out so beautifully. I am really glad that you let me know. I know bread baking can seem intimidating sometimes, but I do think this recipe is a good one to bolster a baker's confidence. Good luck and keep on baking!
Warmly,
Jane
I often read recipes on my phone. However waiting for the instructions to add the yeast and not wasn't there. Found it afterwards when I clicked on printable version. There goes all my ingredients..
Dear Anonymous,
Profound apologies for that omission from the recipe, regarding the yeast! I have fixed the recipe in the post. I am so sorry that mistake caused you to waste ingredients. I appreciate very much that you let me know. Thank you for telling me!
Jane
I made this for a friend who can't have any dairy products. It was amazing! It is so hard to find bread recipes without any milk or eggs. The leftovers were also great for grilled cheese sandwiches.
This bread is amazing. I pin hundreds of things but this one is definitely a keeper! It is SO amazing that my husband no longer considers a meal of any kind of pasta, chili or soup (as well as many other dishes!) complete without it! It was simple, tasted amazing and made 2 loaves which was fantastic. I used flour on parchment paper and just shaped the loaves directly on the baking sheet for the last step as I was out of cornmeal. They rose on the baking sheet and then I just baked them on it (no baking stone here unfortunately). I am making it again tonight, to make for the crowd of hunters that will come tumbling in hungry at some point (along with a large crockpot of chill!)...I do not expect leftovers. Last time I had a loaf left and used it for pizza bread the next night - still amazing. :)
I made this bread last night. I thought it was odd that there was not any sugar. But I tried it. As I was waiting for it to rise I thought it was going to be a flop. To my surprise the dough did rise and the bread came was delicious. I'M JUST WONDERING IF I CAN FREEZE THE SECOND LOAF.
I'm making this bread right now. I can't wait to see how it turns out. May I link the recipe to my blog?
https://cookingwithmarietta.wordpress.com
I don't have bread flour...can I use all AP flour?
Is a baking stone a must for making this bread?
Hi Kelly,
Jane here! In answer to your question,
I have never made this particular bread without a baking stone, so I don't know how differently it might bake up, but I am sure it's worth a try to just bake it on, say, a piece of parchment paper laid over a cookie sheet. Don't bother preheating the oven to 500 degrees (since you won't be trying to preheat the stone); just preheat it to 375. I would still use the water-misting technique described in the recipe also, even if no baking stone is involved. Good luck and happy baking! :)
Warmly,
Jane
A great sounding recipe. Plenty of clear, easy to follow instructions. Excellent pics too.
This came out beyond fantastic. Thank you, thank you and again thank you!
I haven't tasted it yet buuuuuuuuuuuuuuut It came out exactly like the pics. I made it by hand because I honestly didn't feel like washing my bread machine (I don't have a stand mixer yet) and I halved the recipe just because I wanted a trial first.
My family and my boyfriend are going to be super duper happy. Oh goodness I am delighted.
You are the greatest
In reply to Kelly's question about wondering whether one truly needs a baking stone to make this bread.
Surprise and good news, you do not! I just used a non-stick baking sheet and everything turned out great.
So if you have a baking stone go right ahead, if you don't have one keep on carrying on as well!
Either way, thank you so much for the recipe Jane! :D
Just popped mine in the oven. Made one big loaf . I mixed in a multi-herb blend and some EVOO in the dough (about Tbs and half) and then coated the loaf with the herb blend and EVOO before putting in the oven. Not sure how long it will need but I am keeping my eye on it. Opted for throwing in ice cubes in a pan at the bottom of the oven instead of the spritzing. We shall see. The nose say "good". Meatballs and sauce are screaming for it. Thank you for a wonderful post and recipe.
What if I don't have a baking stone? Will a commercial grade roasting pan work as well?
Hi Anonymous,
Jane here! If you don't have a baking stone, try baking it on a cookie sheet covered with parchment paper, or dusted with some extra cornmeal so the dough doesn't stick. I really don't know how well a commercial roasting pan would work, but if that's all you've got it would still be worth a try. Might just turn out great. Good luck in any event, and happy baking!
Warmly,
Jane of Jane's Sweets
I only have a bread machine. Can I bake this on the dough cycle and then omit the first rise and go straight to dividing the bread in two and letting it rise and go on from there? I can't wait to try this bread. Thank you so much for this recipe.
henaultd@att.net
I moved out to CO (no Wegmans here) and have been craving their tuscan garlic bread. This turned out almost exactly like it. The crust was crispy with the perfect amount of herbs, salt and oil. I ended up using 4.5 cups of flour (not the full 5, but maybe ill try that next time) and the loaves were HUGE. They didn't rise UP as much as I thought they would, and instead went OUT. Maybe I didn't let them rise long enough or I didn't knead long enough? Regardless, the baked product turned out perfect. I did not use the baking stone; a baking sheet with parchment paper and cornmeal worked great. I put the dough directly on the baking sheet after the second rising and shaped the loaves on there. I scored it with a regular knife and baked them for ~32 mins (that's at 5,000 feet in CO). Amazing golden brown crust. The hardest part was waiting for it to cool before cutting it. Thanks so much for sharing!!! This is a must for holiday gatherings.
I accidentally used more bread flour than AP, but this actually turned out quite good. A bit different than Wegmans, more dense, but nice crusty exterior. Instead of misting the oven, I put a le crueset cast iron pan filled with water underneath. I also used a pizza steel in lieu of baking stone as my stone finally broke a couple weeks ago.
Post a Comment