Showing posts with label tarts. Show all posts

Friday, February 24, 2012

Lemon-Lime Tarts with Semolina Shortbread Crust . . . Get Your Zing On!


Tarts. They're hard to resist. So cute. So small.

Even the pans they're baked in are adorable. Those scalloped edges. The way the little round bottom part of the pan lifts out, leaving you with a pretty ring of golden crust. Tart shells cry out to be filled with something really good. Something fresh and biting . . . something, well . . . tart. 

Lemons and limes must have been designed with tarts in mind. They supply such an unmistakable zzziing! 

And everyone needs to inject a bit of zing into their life now and again, don't you think?


About this recipe . . . 

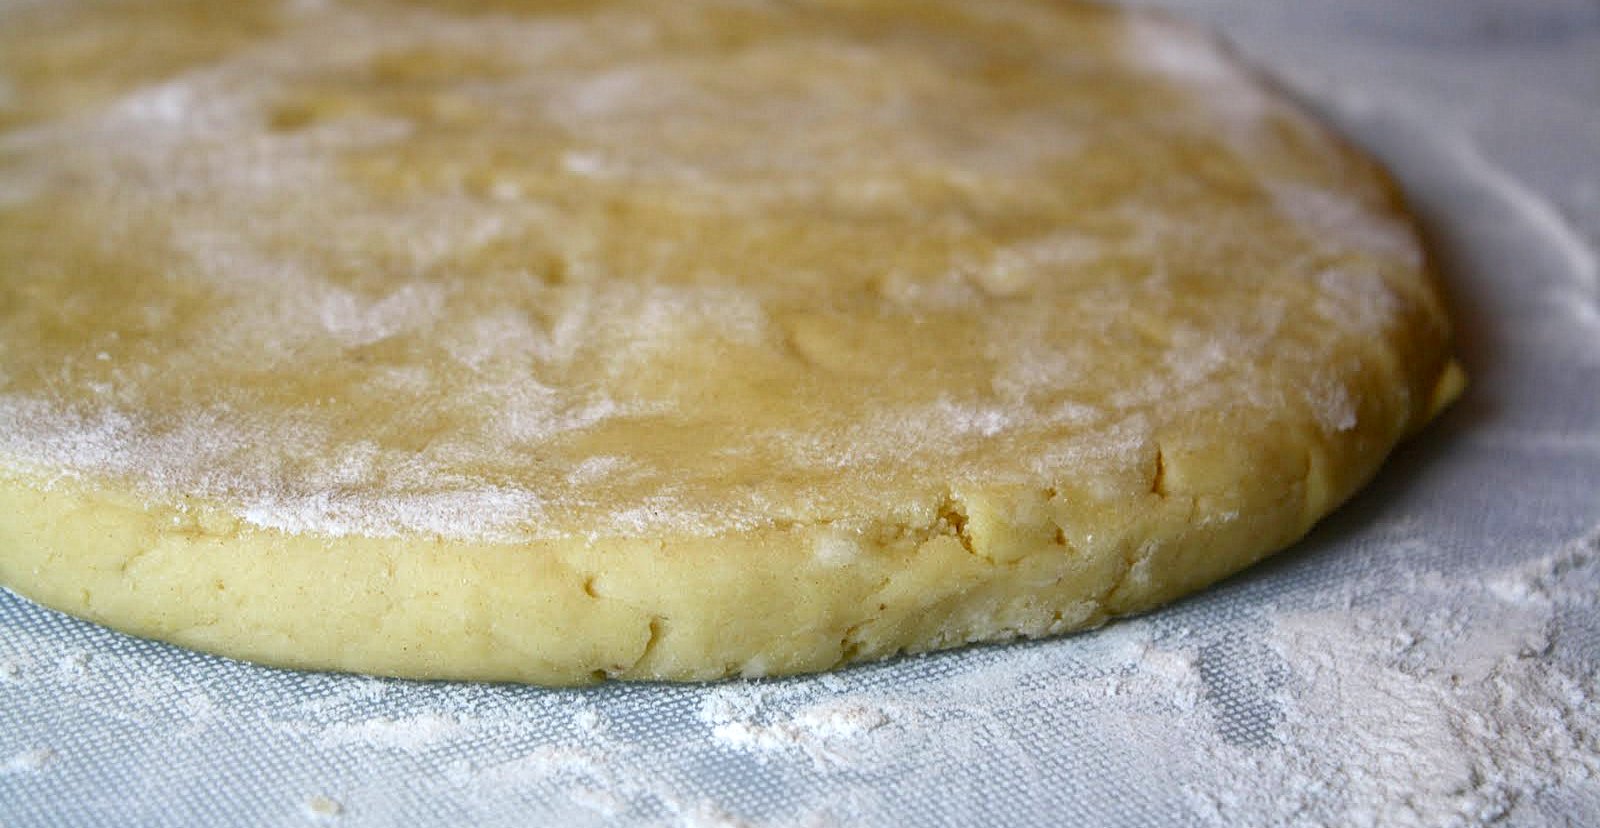
This tart dough is made, in part, with semolina flour, which comes from durum wheat. It's more yellow in hue, and slightly more coarse in texture, than regular flour. Often used to make pasta, semolina reminds me of very finely ground corn meal. It makes for a firm tart shell that's pleasantly crumbly when you finally sink your teeth into it. Nice flavor, too. You can find it in small packages in most large grocery stores these days, and reliably in fancier markets (I used Bob's Red Mill brand). The dough recipe is a very simple one adapted from this Tastebook page, that I roughly converted from gram measurements.


The lemon-lime filling I adapted from Flour: Spectacular Recipes from Boston's Flour Bakery & Cafe, by Joanne Chang and Christie Matheson. Full of really satisfying recipes, the book is written in a friendly, matter of fact, let's-do-this-together tone. I'm a sucker for any competent cookbook author who manages not just to teach, but to reassure and embolden home bakers all in the same breath. If you want to feel intimidated don't buy this book. On the other hand, if you want to feel like you're in your kitchen working next to someone who understands that smart home baking should be an engaging and creative task, then you won't be disappointed in this delectable book.


Maybe you're wondering why I didn't top these tarts with meringue? That would have been so logical, right? Well, I almost did. Had my egg whites at the ready and everything. But then the Gods of Whipped Cream called out to me. From my refrigerator . . . 'cuz they live in there. Maybe meringue will win out next time. We'll see.


Lemon-Lime Tarts with Semolina Shortbread Crust
(For a printable version of these recipes, click here!)

Yield for tart dough: Enough to make at least 12 tart shells that are 3-4" in diameter (I used only about half of the dough, made seven tarts, and froze the rest for future use.)

Yield for tart filling: Enough to fill about 7 to 8 tart shells.

To make the tart shells:

Ingredients--
3 sticks and 1 Tbsp. unsalted butter, softened (that's 1 and 1/2 cups, plus 1 Tbsp.)
3/4 cup granulated sugar
2 and 2/3 cups unbleached all-purpose flour
2/3 cup cornstarch
1/3 cup and 1 Tbsp. semolina flour
1 and 1/2 tsp. coarse kosher salt

Preheat your oven to 325 degrees. In the large bowl of your mixer, on medium speed, cream together the butter and sugar for two or three minutes, until it looks light and fluffy.

In a separate bowl, whisk together the all-purpose flour, cornstarch, semolina flour, and salt.  With your mixer on low speed, pour this into the butter mixture in two additions. Stop to scrape the bowl and beaters between additions. Beat just until obviously blended. Don't over-mix.

If you're using tart pans that are 3" to 4" in diameter, put a glob of dough about the size of a large walnut into each one. Press with your fingers so the dough is evenly spread on the bottom and all the way up the sides of each tart pan. Be sure to gently nudge the dough closely into the scallops so the design will be firmly impressed into the shells when they're unmolded after baking. Use a fork to prick the bottom of the shells; this will help keep them from puffing up while baking. (Also, I recommend placing pie weights in muffin papers set in each tart pan over the dough. That's the best insurance to help them keep their shape as they bake.)

Place all the filled tart pans on a baking sheet with sides. Bake on the middle rack of your oven for approximately 20 to 25 minutes, or until lightly golden. When the shells are done baking, place them on a cooling rack for a few minutes before removing them from the pans to cool completely before filling them.

To make the lemon-lime filling:

Ingredients--
1/2 cup plus 2 Tbsp. granulated sugar
3 Tbsp. cornstarch
1/8 tsp. kosher salt
1/2 cup plus 2 Tbsp. water
1 Tbsp. heavy cream
yolks from 3 large eggs (You can freeze those leftover whites. I do it all the time.)
1/2 cup fresh-squeezed lemon juice (strained to remove seeds and pulp)
2 Tbsp. fresh-squeezed lime juice (strained to remove seeds and pulp)
1 Tbsp. butter, softened
1/2 tsp. vanilla extract

In a medium size saucepan, whisk the sugar, cornstarch, salt, water, and heavy cream. Cook the mixture over medium-high heat until it starts to thicken up and looks translucent (you'll know it when you see it).

While the sugar is cooking, in a medium size heat-proof bowl, whisk the egg yolks, lemon juice, and lime juice together. After the sugar mixture on the stove has thickened, as noted above, pour it slowly into the bowl of yolks and juice, whisking all the while (you don't want the hot sugar to cook the eggs, so just keep on whisking). When it's all mixed in, pour it all back into the saucepan and return that to the stove. Over medium heat, cook for 3 to 4 minutes, stirring continually the entire time, now with a wooden spoon (the mixture's going to get super hot, thus it's better to do this with a wooden spoon), until it thickens. Take the pan off the heat and immediately stir in the butter and vanilla.

Scoop or spoon the hot filling evenly into the baked, cooled tart shells. Let the filling cool down somewhat before you refrigerate the filled tarts. When the tarts are cold, top them with sweetened whipped cream (toss a few tablespoons of sifted confectioners' sugar in when whipping the cream) before serving, if you like, and garnish each one with little wedges of lemon and lime, or perhaps a few raspberries or a nice big blackberry or strawberry.


(If you'd like to comment on this post, or to read any existing comments, please click on the purple COMMENTS below!)

Friday, April 29, 2011

Vidalia Onion Tarts with Smoked Bacon . . . Relying on the Kindness of Onions


"Life is like an onion: You peel it off one layer at a time, and sometimes you weep." -- Carl Sandburg (1878-1967)

This time of year, is there anything lovelier than a lustrous and golden Vidalia onion? The moist heft and smooth skin of the typical one-pounder naturally appeals to us. It's fresh and ripe in a way that most onions can only dream about. The way in which the Vidalias show up just once a year, have their coming-out party, and then, for the most part, quietly recede into the background endears us to them. They're similar to the New England cranberry crop in that respect--fragile in their brief longevity, and very distinctly American.


One could say that Vidalias didn't appear on the scene by design; they just happened. They were in fact a fluke, planted by a Depression-era Georgia farmer (Mr. Moses Coleman) who didn't get quite what he expected upon tasting his onion crop in 1931. Onions weren't supposed to be sweet! Who'd want a sweet onion? Indeed. Turned out everybody wanted a sweet onion. And they still do.


Personally, I tend to feel that Vidalias are the most cooperative member of the allium family (allium cepa vidalia, to be specific). They kindly refrain from burning my eyes when I slice them. Despite their rather forward juiciness, they shy away from causing discomfort. Most vegetables aren't that thoughtful. That fact alone sets the Vidalia apart from its less civilized and more barbaric cousins, as far as I'm concerned. How can you not love an onion that cares about your feelings? I mean, really.


Some folks even claim you can bite into one and munch it like an apple. Not sure I'm quite brave enough to try that just yet . . . but maybe one of these days I'll give it a go.


About this recipe . . . 

One of my favorite pastry chefs, Nick Malgieri, has published at least two onion-tart recipes over the years that are very similar. This particular recipe, which he calls Swiss onion tart, is adapted from his book The Modern Baker; it is the less rich of the two I am familiar with (the other recipe, which calls for lard in the crust and higher quantities of eggs and cream, appears as Alsatian onion tart in an earlier book, A Baker's Tour).


Malgieri notes that he doesn't like to use onions that are sweet in this type of tart, but I have to disagree. I thought it was the perfect venue for beautiful sugary Vidalias. (This is blog is called Jane's Sweets, after all.) I reworded the instructions to reflect exactly what I did when I made these.


This satisfying little tart makes a nice main dish for a light lunch, alongside a spring-greens salad, and a thick wedge of melon. I can even see packing these tarts into a picnic basket.

Vidalia Onion Tart with Smoked Bacon
(For a printable version of this recipe, click here!)

Yield: Eight individual small tarts, or one large 10" - 12" tart

Ingredients for the tart dough:
1 and 1/2 cups all-purpose flour (I used unbleached.)
1/2 tsp. salt (I used sea salt.)
1 tsp. baking powder
10 Tbsp. unsalted butter, very cold, cut into chunks
1 large egg
1 large egg yolk

To make the tart dough: 
In the large bowl of a food processor fitted with the metal blade, combine the flour, salt, and baking soda. Add into that the butter chunks, and pulse about 20 times until finely mixed.


Add in the egg and the egg yolk; pulse just until the dough begins to form into a ball.


Dump the dough out onto a lightly floured surface, gather it together, and press it into a round disk about 1/2" in thickness.


Cover the disk with plastic wrap and refrigerate it for one hour before rolling out. 

Ingredients for the filling:
6 or 7 strips of thick cut smoked bacon, cooked until crisp (Be sure to make enough to equal 1/2 cup when fully cooked, well drained, and diced. Leave a very small amount of the bacon fat in the pan you used to cook the bacon; you'll use the same pan to cook the onions.)
3 Tbsp. butter, unsalted
1 and 1/2 lbs. Vidalia onions, peeled, halved, and sliced 1/4" thick
Salt (I used sea salt.)
1 Tbsp. all-purpose flour (I used unbleached.)
1/2 cup milk (I used 2 percent.)
1/2 heavy cream
Fresh ground black pepper
Fresh ground nutmeg (Don't use too much. Seriously.)
3 eggs, large


In the same pan that you used to make the bacon, melt the butter on medium heat. Add in all of the onions and generously salt them. When they begin to sizzle, lower the heat, and cover the pan. Cook for 20 minutes, stirring now and then; you want the onions to exude most of their water. Remove the lid, and continue to let the onions cook slowly for about 20 more minutes. They should be golden and quite reduced (aka caramelized!). When they're done, set them aside in the pan.


Preheat the oven to 350 degrees. Remove the dough from the fridge and cut it, pie style, into as many pieces as you'll need (eight equal sections for eight small tart pans, etc.), shaping each piece into a small disk. On a floured surface, using a floured rolling pin, roll each piece of dough out one at a time into a circle a little larger than your tart pan. Gently press the rolled piece down into the pan (best to use tart pans with removable bottoms) without stretching the dough.


Run the rolling pin right over the top; it will cut off the overhanging dough to give each tart a clean edge. Do this for all of your tarts. Put the tart shells onto a baking sheet.

In a large mixing bowl, place the 1 Tbsp. flour. Pouring slowly, whisk in the milk first, and then the cream. Stir in all of the cooked onions, excluding any extra drippings from the pan. Add salt, pepper, and a scant pinch of nutmeg to taste. Whisk the eggs in a small bowl with a fork, then add them in as well. Stir well to completely combine.


Portion the filling into each tart shell evenly (I used a small ladle to do this), making sure to put some onions into each one. Sprinkle bacon over the top of each tart.


Bake the tarts, on the baking sheet, for approximately 30 minutes, or until golden all over.


Let the tarts cool slightly before removing them carefully from their pans. Leftover tarts reheat well in the oven or microwave and can be  refrigerated for a couple of days without losing their gusto.

(If you'd like to comment on this post, or to read any existing comments, please click on the purple COMMENTS below!)

Friday, January 22, 2010

Not Just a Tart . . . She's a Raspberry Honey Mascarpone Tart!

Until one frosty morning last week, I had never purchased it. It's a bit out of my usual grocery price range, and a girl has to draw the line somewhere. Start buying mascarpone cheese on a regular basis and before you know it you're dipping into your kid's piggy bank for spare change. It's a slippery slope. But you can't wait forever to procure interesting ingredients, especially if you're looking to expand your baking and pastry repertoire. Expenditure comes with the territory.

And so, with the temporary mindset of a woman in possession of a much fatter wallet, I tossed the hefty little container in my shopping cart and foraged on. I wandered down the baking aisle. Enticing items beckoned their way into my basket . . . locally produced pastry flour, natural demarara cane sugar, imported instant yeast. All overpriced, but I bought them anyway.

Once at home, I tucked my stash away like a squirrel who'd been ferreting acorns. Except for the mascarpone cheese, that is. I had plans for the mascarpone cheese.

About those plans . . .

This recipe hails from A Passion for Desserts by pastry chef Emily Luchetti, a beautiful book. The only alteration I made included the addition of a tiny bit of Chambord, which is a sweet raspberry liqueur, to the raspberry sauce. And, since I didn't have several small individual tart pans, I used just two 8" tart pans instead. I also reworded the instructions to some extent.

You'll love this simple tart. The filling is luscious, with perfectly balanced flavor. The pastry is buttery and flaky, but firm enough to hold up its end of the tart bargain, and the raspberry sauce is like summertime on your tongue. You can't go wrong.


Raspberry Honey Mascarpone Tart
Makes either two 8" round tarts, or four 4" tarts.

(For a printable version of this recipe, click here!)

For the tart shell dough:
1 and 1/2 cups all-purpose flour
2 Tbsp. granulated sugar
pinch of salt
10 Tbsp. (5 oz.) cold unsalted butter, cut into chunks
2 Tbsp. heavy cream
1 large egg

Combine all ingredients except cream and egg in a large bowl. Using two knives or a hand-held pastry blender, cut in the butter until it's the size of small peas. Whisk the cream and egg together in a small bowl. Pour that into the dry ingredients and stir with a fork until the dough comes together. (You can also assemble this dough in a food processor, but if you do that just be very careful not to over-process it, pulsing only as much as necessary for the dough to cohere.)

Dump the dough out of the bowl onto a sheet of plastic wrap. Shape it into a 5 to 6 inch disk, wrap it well, and refrigerate it for at least half an hour.

Preheat the oven to 400 degrees.

When you're ready to roll the dough out, lightly flour your work surface. Divide the dough as needed to fit your tart pans. (Note from Jane: I divided it evenly in two for my 8" pans, and there was no dough leftover. I rolled out two circles about 10" in circumference. It was about 1/8" thick all over. For very small tarts the dough should be rolled a bit thinner.)

Roll out your dough, then lift it carefully and place it over your tart pans, pressing the dough gently against the sides. Trim off any excess dough cleanly at the top rim.

Cut out parchment circles--you'll need one for each pan--that are at least three inches larger than the tart pans themselves. Place the parchment circles in the pans, and fill them with weights (I used dry beans).

Place the weight-filled pans onto a cookie sheet and bake them in a 400 degree oven for about 20 minutes, just until the top edges start to turn golden brown but don't remove them from the oven yet. At that point, grasp the excess parchment above the pan rim, and using the paper as a handle, slowly lift the beans in the paper circles out of the tart shells and set them aside. Continue baking the empty tart shells for about ten more minutes so the bottom crust can brown as well.

Remove them from the oven and let the tart shells cool in their pans, on a rack. They must be completely cooled before you fill them.

For the mascarpone honey cream filling:

8 oz. (1 cup) mascarpone cheese
1 Tbsp. plus 1 tsp. good-quality honey (I used wildflower honey)
2 Tbsp. granulated sugar
1 pinch salt
3 Tbsp. heavy cream

In a medium bowl, whisk together all ingredients until thick. Keep this mixture covered and chilled until you're ready to spread it in your tart shells.

For the raspberry sauce:

One 12 oz. bag of frozen whole raspberries, no sugar added, defrosted
2 Tbsp. granulated sugar
1 Tbsp. raspberry liqueur, like Chambord (optional)

Puree the defrosted raspberries completely in a food processor. Strain the puree over a bowl with a fine mesh sieve to remove the seeds. Discard the seeds. Stir in the sugar, and the liqueur if using. Taste for sweetness and add more sugar if needed. Keep this chilled until you're ready to serve the tarts.

To assemble the tarts:

You'll need the baked tart shells, the chilled mascarpone cream, the raspberry sauce, and at least 6 oz. of whole, fresh raspberries.

Spoon the cold mascarpone mixture evenly into each tart shell, one by one, and smooth it out, filling the shell to the edges. Serve each small individual tart, or each slice of tart, with a few fresh raspberries, and use the sauce either as a garnish around the tart on the plate, or drizzled over the tart. (Note from Jane: I put the sauce in a food-safe plastic squirt bottle and used that to easily make the little dotted design on the plates. The sauce is so delicious, however, you might find that your diners request more of it while they're munching on this dessert, so you may want to keep any extra sauce close at hand!)


(If you'd like to comment on this post, or to read any existing comments, click on the purple COMMENTS below!)

Saturday, August 1, 2009

A Plum Galette by any other name is still a Rustic Plum Tart and a Plum Crostata . . .

Call it what you will, a plum galette/rustic tart/crostata is a wondrous marvel of simplicity, constructable by anyone who can wield a rolling pin and slice fruit. Just about any dough that's usable for pie crust will do. Nothing fancy to worry about--no elaborate edge crimping, no lattice weaving, no need to weep bitterly if the dough tears while en route to the baking sheet. It's the miracle dessert. Touch it and you'll be healed. (Okay, not really. Forgive my irreverence. Touch it and you'll just really want to eat it.)

When brevity is the name of the game, make a galette. Grab a portion of pie crust dough that's been at the ready, frozen in your freezer; it will defrost quickly while you're gathering and cutting up your fruit. Scrounge around in your fridge for some nice stone fruit that's eager to be eaten up. Plums, peaches, nectarines, etc. --any of those will work. Throw in a few sweet cherries or berries of some kind for added color if you like. Assuming you have a usable chunk of dough laying around, you can probably get one of these babies into the oven in 20 minutes without breaking a sweat.

For the galette you see pictured, I used a basic pate brisee recipe that I've used before for fruit pies. For one galette, you'll need the equivalent amount of dough that you'd need for a one-crust pie.


Plum Galette (aka Rustic Tart/Crostata)

(For a printable version of this recipe, click here!)

Heat oven to 375 degrees.

About the dough:
Any pie dough recipe you like will probably do fine but here's the one I used. This recipe makes enough for two double-crust pies or four single-crust pies; it's good to be able to grab a package of your own ready-to-use dough from the freezer whenever you need it. This recipe makes enough for four galettes--one now and three in the future! Wahooo!

3 and 1/2 cups AP flour, bleached
1 cup cake flour
1 Tbsp. granulated sugar
1 lb. minus 2 Tbsp. (that's 3 sticks plus 6 Tbsp.) of unsalted butter, cut into smallish cubes and put in the freezer for about one hour
1 and 1/2 tsp. fresh lemon juice
3/4 cup ice water, plus more on hand if needed

Combine the two flours, sugar, and salt in the large bowl of a food processor. Pulse until well combined. (Or, do the whole process below by hand in a big bowl with a pastry blender if you prefer. It'll work just as well.)

Scatter the frozen butter cubes over the top of the flour. Pulse the food processor until the cubes are no smaller than peas.

Slowly add the lemon juice and half the water, pulsing just until combined. Continue adding more water until the dough holds together when you test it by pressing a bit of it in your hand. When the dough seems ready to you, dump it into a large regular bowl, or onto a clean flat surface, so you can gather it all up into a ball.

Divide the ball into four equal parts, and shape each one into a flattened disk. Wrap all of the disks individually in plastic wrap and refrigerate however many of them you plan to use within a day or two; freeze the rest.

For the fruit filling:
Use stone fruit, sliced up into large bite-size pieces (plums, peaches, nectarines, apricots will all work; I used about 7 medium-sized plums, and a handful of dark sweet cherries that had been pitted and cut into quarters) and, if you like, add some sweet berries for added color.

1/2 cup granulated sugar
2 Tbsp. cornstarch
large pinch of salt
1 egg beaten with two teaspoons of cold water
3-4 Tbsp. sanding sugar or granulated sugar (for top of galette)

Mix all of he fruit, sugar, cornstarch and salt together in a large bowl. Set aside.

To assemble the galette:

When your dough is cold and ready to be rolled out, sprinkle flour lightly onto your surface. Roll the dough into a 14" circle. Transfer the rolled dough to a parchment-paper covered baking sheet (or roll the dough out on the parchment to start with, if you like).

Place all of the fruit, and all of its sugary juice, into a pile in the middle of the rolled dough. Leave about 2" of dough as a margin all around. Bring the edges of the dough up around the fruit, bit by bit, "pleating" the dough with your fingers, and squeezing it together at the top as needed so it holds together without falling back down. If any part of it tears, just patch it back together. Remember, it's rustic.

Use a pastry brush to brush the egg mixture onto the crust.

Sprinkle the entire top of the galette generously with sanding sugar or granulated sugar.


Bake the galette in a 375 oven for about 25 minutes or so, until golden brown.

Serve warm or cold, garnished if you like with whipped cream or vanilla ice cream.

So uncomplicated, and yet the end result will amaze and astound. Isn't it nice to simplify? (Henry David Thoreau would be so proud of us. "Simplify, simplify." I'll bet he liked to bake.)


(If you'd like to comment on this post or read any existing comments, just click on the purple COMMENTS below!)