

Last summer, upon turning 13, Nathan requested a towering ice cream cake; I made that, and he loved it. The year before, he wanted me to make a cake that looked like a furry monkey's face, and I complied; it was pretty cute, and he adored it. This year, though, the cake he asked for seemed to reflect his maturing taste, and he chose carefully. As his mom, it was a little poignant for me to note this because it's just another indication that he's growing up. He is, after all, my youngest. It's also, though, a bit thrilling to watch his progress. (I often say to my sons, "I know you're not a baby, but you'll always be my baby." Then they smile and roll their eyes.)

Happily, Nathan is still mostly a kid. He pilots his skateboard like a jockey on a thoroughbred, draws psychedelic graffiti in a sketchbook whenever the inspiration hits, and every now and then he thrusts his arm toward me, fist tightly closed, and boyishly commands, "Pound it, Mom!" Yep. He's Nathan, he's 14, and he's a great kid.

About this recipe . . .
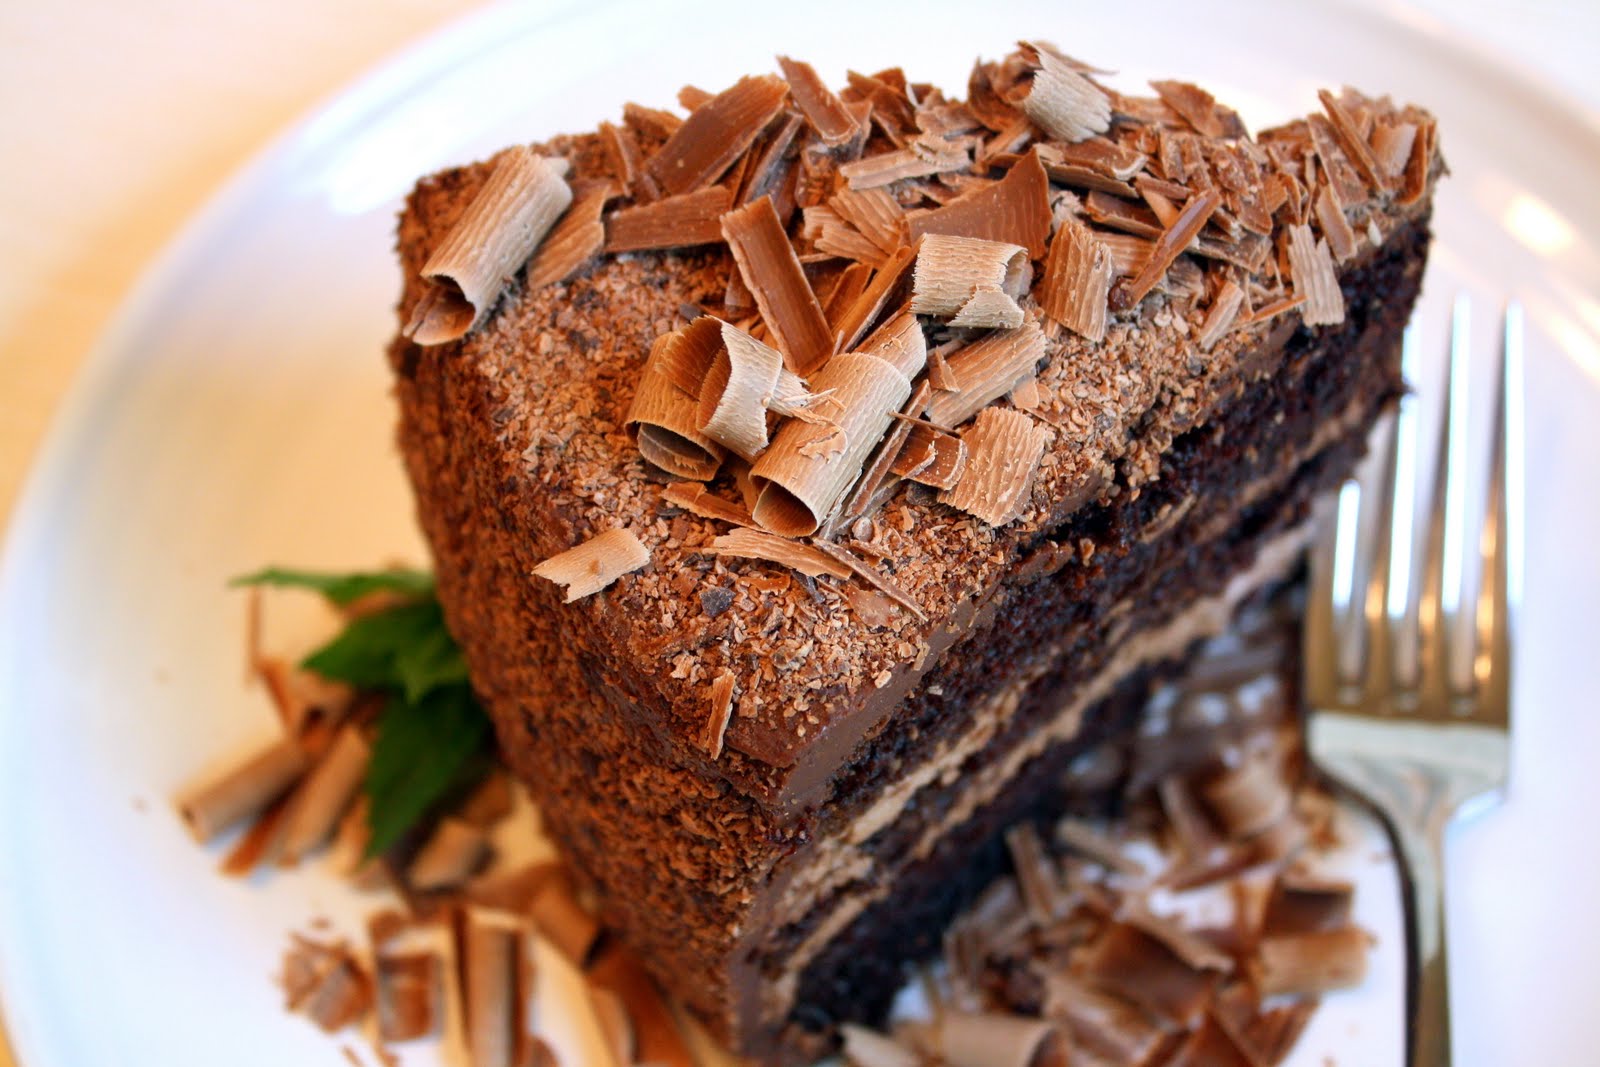
This multi-step formula hails from a "Cooking with Paula Deen" special-issue magazine that I received as a gift a couple of years ago, called Paula Deen's Chocolate Celebration. It really is a fabulous concoction--from the soft moist cake, to the fluffy mousse filling, to the ganache-like icing. The crumbly coating you see on the outside is made from a combo of milk- and dark chocolate that's been grated (use your favorite premium chocolate for this part--don't skimp) and curled.

Though not at all difficult to make, this dessert does demand some planning, so be sure to organize your day accordingly. An impressive and extremely delicious cake for a special occasion, this one is well worth the labor. I adhered pretty closely to the original recipe(s), but did some rewording here and there. Oh, and the original recipe calls for splitting the layers, so you have six thin layers in all, but I didn't think that was necessary, and just used three unsplit layers for mine.
Chocolate Mousse Cake
(For a printable version of this recipe, click here!)
Because the fluffy mousse needs to chill for about four hours before it can be used, feel free to prepare it first, before you bake the cake.
To make the cake:
Preheat the oven to 350 degrees. Grease three 9" round cake pans. Line the bottom of each pan with parchment cut to fit. Grease the parchment, then flour the bottom and sides of each pan, tapping out the excess flour.
2 cups All-Purpose flour (I used unbleached)
2 cups granulated sugar
3/4 cup cocoa powder (I used natural cocoa)
1 and 1/2 tsp. baking powder
1 and 1/2 tsp. baking soda
3/4 tsp. salt
1 cup milk (I used 2 percent)
1 cup strong brewed coffee
3/4 cup vegetable oil (I used canola)
2 eggs, large
In the large bowl of your mixer, combine the flour, sugar, cocoa, baking powder, baking soda, and salt. All at once, add in the milk, coffee, oil, and eggs. Beat this mixture at medium speed just until smooth. The batter will be very thin. Pour it evenly into the three prepared pans. Bake the cakes for about 20 to 25 minutes, until a toothpick inserted in the center comes out clean and the cake springs back when very lightly touched. Cool the cakes in their pans, on racks, for 10 to 15 minutes. Carefully invert the cakes to remove them from their pans, then invert them again so they can finish cooling on racks right side up.
To make the mousse:
Makes approximately 4 and 1/2 cups (which is a lot--you'll have some leftover!)
1 envelope unflavored gelatin
3 Tbsp. cold water
1/4 cup boiling water
1 cup granulated sugar
1/2 cup unsweetened cocoa powder (use natural, or Dutch process, or a combo; I did the latter)
3 cups heavy cream
In a little bowl, soften the gelatin in the cold water, letting it stand undisturbed for two minutes. Add in the boiling water, and stir it slowly until the gelatin completely dissolves and no lumps are apparent. Set this aside.
In another small bowl, combine the sugar and the cocoa well, with a fork or whisk.
In a medium size mixer bowl, on medium speed, beat the heavy cream until it's quite foamy. Into this, gradually pour the sugar mixture and beat until it holds stiff peaks.
Then, stir in the dissolved gelatin by hand, folding it in evenly (if you don't distribute the gelatin evenly through careful stirring and folding, the mousse will be thicker and firmer in some spots, and too soft in others). Cover the bowl with plastic wrap and chill it in the fridge for at least four hours.
To make the chocolate icing:
Makes approximately 3 cups (I had about 1/2 a cup of this leftover)
1 cup granulated sugar
1 cup heavy cream
5 (1 oz. each) squares unsweetened chocolate
1/2 cup and 2 Tbsp. unsalted butter (doesn't have to be softened)
1 cup confectioner's sugar
Combine the granulated sugar and the cream in a medium size heavy-bottomed saucepan. Carefully bring it to a boil over medium-high heat, then keep it on a low simmer for 6 minutes. Stir it often and watch it closely so it doesn't come to a full boil again. Taking the pan off the heat, add in the butter and chocolate, stirring until it's all completely melted and the mixture is perfectly smooth; let it cool in the pan for 10 minutes. Using a whisk, incorporate all of the confectioner's sugar. Let the icing cool until it reaches a spreadable consistency.
To prepare the grated chocolate, and chocolate curls, for the outside of the cake:
You'll want to have at least 3/4 of a cup of grated chocolate available to cover the cake. If you can find chocolate that comes in big chunks, that is the easiest form in which to hold it for grating. I use Callebaut, a very good brand, which can be purchased in pieces by the pound. I use a combo of dark bittersweet chocolate and milk chocolate, which works well because the milk chocolate is softer and sweeter, while the dark chocolate is a bit drier and moderates the sweetness. Have the grated chocolate in a bowl close at hand before you are ready to coat the sides of the cake. Place a baking sheet with shallow sides on your work surface right near the bowl.
Using a vegetable peeler, peel some larger curls from the chocolate chunks and set them aside on a plate (or put them in the fridge if they're quite soft; they're always extremely fragile and often break when touched). It seems easier to make nice curls from milk chocolate since it tends to be softer and more flexible.
To assemble the cake:
Using a cardboard cake-round (if at all possible, or something that can function in the same capacity), place the first cake layer on it. Using an offset spatula, ice the top of the layer thickly with the chilled mouse. Place the second layer atop this, and cover it as well with a thick layer of the mousse. Place the third and final cake layer on top. If at this point the mousse seems very soft, put the whole cake into the fridge for about half an hour, or into the freezer for 15 minutes.
Using an offset spatula, spread the chocolate icing on the top and sides of the cake. It should be spread on fairly evenly, but it's not critical that you try to make it incredibly smooth, since it will be covered with grated chocolate, and you can gently pat down any uneven areas. While the icing is still quite soft, pick up the iced cake from beneath the cake-board (slide a thin metal spatula beneath it to help you lift it onto your hand). Holding the cake carefully on your non-dominant hand, sprinkle the sides of the cake with the grated chocolate, patting it on gently. Do this while holding the cake above the baking sheet so it can catch the falling chocolate crumbs and you can scoop them up again. Turn the cake as needed until the whole thing is completely covered. Carefully slide/sprinkle the chocolate curls onto the top of the cake. Place your cake on its serving dish. Keep the cake in the refrigerator until shortly before you'll cut it. Because the filling and the icing are rich with dairy products, you should store any leftover cake in the fridge as well.
(If you'd like to comment on this post, or to read any existing comments, please click on the purple COMMENTS below!)


