Sunday, May 30, 2010

Homemade Italian Bread . . . with Herb, Garlic, & Olive Oil Crust


I grew up in a household where bread, however abundant, was not typically served as an everyday accompaniment to dinner. Rolls were presented with special meals, but that was about it.


When I got married, though, my husband always liked having bread or rolls with his supper, so I got in the habit of including it on the evening menu. Of course, he doesn't like eating the insipid, tasteless, uniformly-sliced bread that comes from a plastic bag, so I've tried to supply good bread when I can, the kind that has at least a little more substance and flavor than the mass produced stuff. I usually buy a baguette or a nice loaf of Italian that might be on sale, but more and more lately I'm able to make something myself.


Anyway, I lucked out recently when I adapted a really basic recipe for Italian bread and tried it out on a new baking stone. It was alarmingly delicious, and fantastically golden. An unexpected home run, you might say. I think it's definitely worth sharing, so here it is!


About this recipe . . .

This formula assumes that you have a baking stone and a mixer with a dough hook, but if you don't, feel free to give this a whirl just using your hands for the mixing and kneading, and by using a baking sheet that's been covered with parchment, and the parchment dusted with cornmeal, instead of a baking stone.

Even with no baking stone, it's certainly worth a try, and I'll bet it will turn out fine. (If you do use a baking sheet, though, I'd recommend you put it on the middle rack of your oven; not the bottom rack as you would if you were using a baking stone.)

Italian Bread, with Herb & Olive Oil Crust


(For a printable version of this recipe, click here!)

1 and 1/2 tsp. instant yeast (or, if you can't find instant yeast, use 1 pkg. active dry yeast and proof it first in 1 cup of the warm water) 
3 cups warm water (between 105 and 115 degrees Fahrenheit)
1 Tbsp. kosher salt
2 cups bread flour
4 to 5 cups unbleached All-Purpose flour, plus more for the work surface
Cornmeal (about half a cup should be enough, or extra flour can be used if you don't have cornmeal)

To brush on top of the raw and baked loaves:
1/3 cup olive oil
1/2 tsp. dried oregano
1/2 tsp. dried basil
1/2 tsp. dried parsley
1/4 tsp. kosher salt
1 garlic clove, peeled and finely minced

In  a bowl with the 3 cups warm water, dissolve 1 Tbsp. kosher salt. Pour this into a large mixer bowl. 
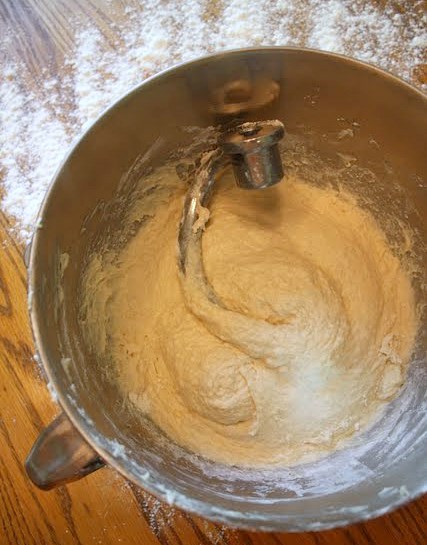
Add the instant yeast, 2 cups of bread flour, and 3 cups of the AP flour into the bowl. Using the paddle attachment, mix on low speed for a couple of minutes to combine. 


Stop the mixer, scrape the bottom of the bowl with a spatula, and switch to the dough hook. On low speed, add in 1 to 2 more cups of AP flour gradually, about 1/2 a cup at a time. Keep mixing until a cohesive dough begins to form, about 4 minutes. (It will be relatively loose and still kind of wet at this point, but it shouldn't be as soft as a thick liquid, if that's any help!)


On a generously floured work surface, dump out the dough. For about 4 minutes, knead the dough firmly but gently by hand. It's okay to incorporate more flour as needed to keep it from sticking to your work surface at this point, but remember that this is meant to be a pretty soft dough. Once the dough is relatively smooth, place it into a large bowl that's been sprayed with vegetable spray, lightly oiled, or greased. Turn the dough over completely in the bowl, just once, so the bottom and top of the dough are both lightly coated. 


Lightly cover the top of the bowl with a piece of plastic wrap that's also been sprayed with vegetable oil, then cover the plastic loosely with a dish towel. Place the covered bowl in a warm place that's free from drafts. Let the dough rise until it's doubled in bulk. This will probably take at least an hour. 


Gently dump the doubled dough out onto a lightly floured board (don't use too much flour at this point if you can help it; just enough to prevent sticking) and knead it for 5 more minutes. 


Divide the dough into 2 equal parts with a bench scraper or a sharp knife and place both pieces, side by side, back into the sprayed bowl (spray again if you think it's needed). Turn the dough, as before, to make sure it's lightly coated. 

Cover the bowl again with sprayed plastic wrap and a dish towel, and let the dough rise again in a warm spot until doubled; this may take up to an hour. 


Gently dump the risen halves out onto a very, very lightly floured work surface and separate them. (The less extra flour you use now the better. Flour that gets incorporated into the dough at this point can leave ugly grayish streaks in the finished loaves.) One at a time, using your hands, shape each dough piece into a typical, Italian bread-style, oblong loaf. Gently lift and place each shaped loaf onto a completely flat wooden cutting board that's been heavily coated with cornmeal; this will function as your baker's peel. (Or, if you do have a baker's peel, use that.) 


The cornmeal is what allows the loaves to slide onto the baking stone. Don't place the loaves too close together! Cover the loaves, on the board/peel, with the sprayed plastic wrap and the dish towel. Let them rise one last time in a warm place, until almost doubled (about 30 minutes).


About 30 minutes before you'll be baking, put your baking stone on the bottom rack of your oven, and set the oven to 500 degrees to preheat (yes, I said 500; when the loaves have risen and you're finally ready to place them in the oven, you'll immediately turn it down to 375 degrees.)

In a small bowl, mix together the olive oil, dried herbs, minced garlic, and salt. Have a pastry brush ready.  


Once the loaves have risen, carefully score (aka slash) the tops with the edge of a sharp razor blade or a baker's lame (the lame is that little contraption pictured below, with the green handle; it's pronounced like the word "Tom"). 


This helps prevent the loaves from bursting haphazardly in the oven. Try not to score too deeply or you may deflate the loaves. Brush the loaves with the herb oil, but only use half of it because you'll need to brush them again a few minutes after they're baked. 


A couple of minutes before you're ready to slide the loaves onto the baking stone, take a spritz bottle of warm water and quickly open the oven door. Squirt the mist into the oven about six times; do not aim at the baking stone. Quickly shut the door. 


When you are actually ready to put the loaves onto the stone, open the door again, swiftly slide the loaves onto the stone with a quick jerk of the board/peel, and again squirt the warm water mist into the oven, above the loaves, about six times. Quickly shut the door, and immediately turn the temperature down to 375 degrees. Don't open the oven again for at least 15 minutes. 


The loaves are done when they are golden brown all over, and their internal temperature is about 200 to 210 degrees. Mine baked about 35 minutes, and I tested the interior with a stem thermometer that I poked into the side. 


After the loaves are done, place them on a cooling rack, and after a few minutes brush them again with the herb olive oil mixture. 


This coating will be absorbed into the warm crust quickly, and it really helps make the bread what it is. But if you'd prefer to skip this second coating, go ahead. In any case, enjoy!


Recipe full disclosure! I adapted this recipe from one that came with my Old Stone Oven Kitchen Supply brand baking stone. I changed the recipe by using part bread flour instead of all All Purpose flour, by using instant yeast vs. active dry yeast, by using kosher vs. regular salt, and by adding the olive oil and herbs component. I also completely rewrote the directions, adding in a lot of my own advice. 


If you'd like to comment on this post, or to read any existing comments, just click on the purple COMMENTS below!


Friday, May 28, 2010

About Artisan Breads . . . Can We Talk?


"Blues is to jazz what yeast is to bread. Without it, it's flat." 
-- Carmen Macrae, (1820-1994) jazz singer and pianist

In culinary school, this short spring semester, I'm taking an artisan breads class. Kind of a crash course, it's ten weeks worth of instruction crammed into five. Starting at noon on Tuesdays and Wednesdays, we work late into the afternoon. It's an incredible immersion in the wondrous details of handmade hearth breads. I have six classmates and one exceptionally well-versed, even-tempered  teacher.


All of us, teacher included, seem pleased to be there. But that's not too surprising because the average age of the students in this class, I would guess, is about 45. I figure if you can't appreciate complex bread by the time you're in middle-age, you're simply never going to. If you reach that age and you do indeed appreciate exceptional bread, then you probably also appreciate a lot of other basic earthy blessings as well. And, if you ask me, that's a good way to live.


I'll just wrap that up and take it home . . .


An enormous fringe benefit of the class is the fact that we're allowed to take home at least one loaf of every bread variety that we prepare. Normally, during the busy part of the school year, almost everything produced by students is used for the culinary school-run restaurant, cafeteria, and retail bakery. For now, though, at the end of each class session, I must resemble a pack mule masquerading as a chef while making the trek out to my car. Along with my usual gear, I'm also laden with a few loaves of supremely fresh bread, all tucked carefully into a brown paper sack, some of them still warm.

(Onion and bacon bread, below.)


Too many to count . . .

Let's see . . . there was the whole wheat sourdough studded with sunflower seeds, flax seeds, and sesame seeds that came home this past Tuesday. Soft inside and slightly dense, with chewy bits here and there, my husband and I loved this one. Have a nice piece of this along with a hearty salad, and you're good to go.


And the French cheddar that came home the first week was irresistible. With veins of orange cheese woven throughout and atop the loaf, this one was really hard to ignore. My kids gobbled most of it up.


The big round sesame semolina loaf--my favorite from this week--was tender inside, with an irregular bubbly texture and a beautifully creamy crumb. Pictured below, it's parked next to a compact onion and parmesan sourdough.


Then again, maybe the chocolate cherry sourdough loaf, at the forefront in the photo below, wins the prize for this week. Spiked with big flat chunks of Callebaut dark chocolate and whole dried sweet cherries, I thought this was pretty extraordinary. I'm a devoted chocolate fan, as you know, but the cynic in me withheld judgment until I bit into a slice. All I can think to say to you is yum. There is no adjective in English sufficient to describe the flavor pairing of high quality chocolate, cherries, and really good bread. Our teacher, Chef Andy, recommended we try making this into French toast. Sweet Jesus.


And then there were all the flatbreads, made last week: naan, pita, chapatis, flour tortillas, regular and gluten-free pizza, Armenian cracker bread, and the slightly puffy sweet-olive-oil bread with its pretty sand-dollar design. Most of these were brand new baking experiences for me, now at least partially demystified. Not that we could legitimately duplicate the genuine article with all of these--I mean, come on, real naan?--but at least we took an honest swing at them, yes?


Like an infant . . .

In the midst of all this, I find myself continually comparing the making of dough, and the baking of bread, to taking care of a baby. The dough is tactile and warm, like an infant. It requires careful and focused attention, just like a new addition to the family does, and in one sense it's quite literally alive.

(A moist, soft, potato bread below.)


And, so, here I go again. For the first time in my baking life, I've made and used a liquid sourdough starter. We all got these going on the first day of class. It took two weeks to reach maturity, after being quite literally fed and burped and fussed over. I'm grateful to report that it performed most admirably in class this week when used in a few recipes. Now safely back at home in the fridge, it's been sleeping quietly through the night. What more could I ask?

(Below is garlic and potato bread, made with redskin potato and garlic cloves that were roasted in olive oil before being mixed into the dough.)


You mean I'm cured, doc?

I've remarked repeatedly over the past year about my fear of baking with yeast, but you know what? I think I'm just about cured. No kidding! This total immersion bread-therapy has been good for me. So good, I went out and bought a big baking stone last Monday, as well as a home-oven sized baker's peel.


I tried out these implements a few days ago with results that astounded even me. I look forward to sharing those results with you soon. But for the moment, I think I've probably talked enough. Thanks so much for listening to me ramble. I figured I'd better tell you about my bread class pretty soon or risk bursting and deflating like dough that's been left in the proofing-box too long. Oh, and I just wanted to tell you, I think you guys are the best thing since sliced bread.

Saturday, May 22, 2010

Bittersweet Chocolate & Pistachio Biscotti . . .


Mother's Day, a couple of weeks back, was very, very good to me. From my husband and boys I received a fantastic new cake turntable. It's the one I've coveted for months, the best one I've ever seen--and I've seen quite a few over the last couple of years. Really heavy, with a nondetachable cast-iron base and a rubber-lined bottom, it's as sturdy as all get out. This baby spins more smoothly than a roulette wheel in Vegas. I love it. My 13-year old son, Nathan, and I set it spinning one night and it twirled nonstop for over three minutes. That must be some kind of record. We were in awe. 


I took it for a test drive last weekend. Used it to frost a coconut cake with seven minute frosting. The turntable was a hit. The cake layers were not too shabby. But the glossy, snowy-white frosting? That stuff was drippier than white-hot asphalt and twice as sticky. I didn't bother photographing that baby. I'm gonna give coconut cake another try sometime soon, next time with a completely different coating. Stay tuned.

Anyway, I also received a copy of The Sono Baking Company Cookbook, by John Barricelli. It's a brand  new book and I'm pleased to report it has enormous appeal. There's nothing worse than eagerly anticipating the publication of a long-awaited cookbook and, upon receiving it, being let down. Want to know my informal barometer of how much I like a cookbook? I use torn pieces of sticky notes as bookmarks to help me keep track of recipes I want to try; with this book, I expect to have so many pieces of paper sticking up out of the top it's gonna look like it's growing a thick head of hair.

This biscotti recipe, which I apparently adapted in less than stellar fashion, is the first biscotti I've made in many months. The end result was not what I expected, but it was interesting enough. I'm used to biscotti that's very dry, very crunchy, and structurally solid. There was an unexpected denseness to the texture of this biscotti, and though not actually moist, it was certainly not dry in the way I thought it should be. It had a slight crumbly aspect, too, that seemed odd. Perhaps I underbaked them?


Of course, I veered from the original recipe in my use of pistachios, versus the recommended hazelnuts. I think I probably sliced the loaves too thickly. I wanted the individual slices to be long and not stubby, so I ignored the author's advice to make them into two 17" long logs. I made mine into two 12" long oval loafs. Were I to repeat this recipe, I'd use almost-finely chopped nuts. I also think I'd use a sweeter chocolate. The bitterness of very dark chocolate in combination with the highly distinctive taste of pistachios didn't seamlessly mesh.


So, it's not bad biscotti, all in all, but nothing to write home about as I prepared it. Had I stuck to the letter of the recipe, I might be singing a dramatically different tune right now. But that's okay. Live and learn!

Bittersweet Chocolate & Pistachio Biscotti 

1 cup nuts (as noted above, the original recipe calls for hazelnuts and I used unsalted pistachios; next time I might try almonds. You should use what you prefer!)
2 and 2/3 cups All-Purpose flour (I used unbleached) 
1/2 cup Dutch processed cocoa powder
1 Tbsp. baking powder
1/2 cup unsalted butter, at room temperature
3/4 cup granulated sugar
1 tsp. coarse salt (I used kosher)
3 large eggs, at room temperature
2 oz. bittersweet chocolate, very finely chopped
1 large egg white, lightly beaten, for the egg wash
coarse/sanding sugar for sprinkling

Preheat oven to 350 degrees. Line a large baking with parchment paper. 
Chop the nuts into very small pieces.

Whisk together the flour, cocoa powder, and baking powder in a bowl. Set aside.

In a mixer bowl, using the paddle attachment, beat the butter, granulated sugar, and salt on medium-high speed until light and fluffy, for about 2 to 3 minutes. Scrape the bowl and beaters as needed. Blend in the eggs one at a time. 


On low speed, pour in the dry ingredients and mix until the flour has been absorbed. 


Remove the bowl from the mixer. The dough will be quite thick. Using a spoon or spatula, fold/stir in the chopped chocolate and the nuts. (My dough was extremely stiff and hard to stir/fold.)


Form the dough into a ball and divide it in half. On a work surface dusted with flour, and with flour dusted hands, shape each half into a log (17" long) or a loaf shape (about 12" long). Transfer each log/loaf to the baking sheet. The log/loaf should be rather flat, no more than an about inch high.


Brush each loaf with the beaten egg white, and sprinkle each one with sanding/coarse sugar. 


Bake the loaves for about 20 minutes on the middle rack, until they spring back slightly when pressed at the thickest spot. (After 10 minutes of baking, reverse the direction of the baking sheet in the oven for even baking.) Leaving the oven on, remove the loaves from the oven and let them cool on the baking sheet, set on top of a cooling rack, for about 10 minutes.


Move the loaves carefully onto a cutting surface. Using a serrated knife or a very sharp chef's knife (I used the latter; the former didn't work for me at all), cut the loaves on the diagonal into slices about 3/4" thick. 


Put all of the slices on the baking sheet, cut side down.  Place in the oven to bake for another 12 minutes or so, until the biscotti are completely dried and crisp (thus do as I say, not as I did!). 


Cool the slices on the pan for a about 10 minutes, then let them cool completely on a rack. Store the cooled biscotti in a covered container for up to about 1 week. 


(If you'd like to comment on this post, or to read any existing comments, please click on the purple COMMENTS below!)