Thursday, May 20, 2010

Georgia in My Oven: Fresh Blackberry Buckle


When I was in my early teens, my family drove to Georgia two or three times to visit close  relatives who had recently moved there from the Detroit area. My aunt, uncle, and three cousins had settled quite contentedly into a nice house on a woodsy street, in a town with a distinctly southern name--Lilburn. It was a beautiful place for kids and it stood in rather stark contrast to the suburban neighborhood they'd left behind. In fact, their new home was within easy walking distance of a spacious cow pasture.

One of my favorite memories involves the wild blackberries that grew in chaotic bushy tangles near the pasture. Quite tall and guarded by thorns, the vines resisted yielding their fruit. But one steamy morning, undaunted as only teenage girls can be, my cousin Becky and I rose early, dressed for berry picking, and buoyantly made our way down the street. Though the sun was scarcely up, the day was already a scorcher. Armed with baskets, we fully expected to come home bearing a huge load of the black beauties, which my aunt would transform into any number of fabulous treats (ahh, youth).


We knew about the thorns. We knew about the heat. We knew that our sandals and feet would end up coated with a velvety layer of thick dust the hue of wilted rose petals. What we weren't prepared for, however, were the battalions of mosquitoes that engulfed us upon arrival.


I recall a lot of arm flailing, girlish shrieking, and frantic attempts at picking. How long this went on before we surrendered is anyone's guess. All I do know is that when we arrived home and showed my aunt our haul, we were two bedraggled, perspiring adolescents with purple fingertips and an enormous number of mosquito bites. Amused, she chuckled and said something to the tune of, " . . . well, there aren't enough here for a pie . . . maybe we can make cobbler . . . did you eat a lot them on the way home?"


My aunt did make those berries into some sort of dessert, but memory fails me as to the specifics. In any case, I'm sure those were the finest tasting blackberries I've ever had. To this day I think of blackberries as something not easily obtainable, and I guess I'll always associate them with the red soil and voracious mosquitoes of that particular Georgia summer.


About this recipe . . .

This buckle recipe comes to us from Southern Grace Farms, a fresh produce grower in a Georgia town called Enigma. I figure a professional blackberry farm must know how to make the best of its own bounty, so I frequently search for good recipes within such sites. (And, frankly, that town name alone made the recipe worth trying.) This blackberry buckle is simple as can be to put together. It's kind of a cross between a very moist butter cake and an excellent shortcake, mixed together with a bowl of sweet fresh berries. Just remember: The better your berries, the better your buckle! Can't make a tasty buckle out of bad berries.


I reworded the original recipe's instructions, and adapted the ingredients and the proportions a bit.


Blackberry Buckle

(For a printable version of this recipe, click here!)

Preheat oven to 375 degrees. Lightly grease and flour, or spray with baking spray, a 1 and 1/2 quart glass casserole dish. 

1 cup All Purpose flour (I used unbleached)
1 and 1/2 tsp. baking powder
1/4 tsp. kosher salt
1/2 cup unsalted butter, softened
1/2 cup granulated sugar
1 large egg
1/3 cup half & half
1 tsp. vanilla extract
3 cups fresh blackberries
1/3 cup granulated sugar
1/3 cup All Purpose flour
3/4 tsp. ground cinnamon
4 Tbsp. unsalted butter, cold
1/8 tsp. kosher salt

In a small bowl, stir together the 1 cup flour, baking powder, and 1/4 tsp. salt. Set aside.  In a large mixer bowl, beat together the butter and sugar on medium speed until light and fluffy. Add in the egg until smoothly incorporated.


Combine the half & half and the vanilla. At low speed, add in the flour mixture alternately with the liquid--three parts flour and two parts liquid, beginning and ending with the flour.


Pour the batter into the greased dish and spread it evenly with your spatula.


Arrange the berries over the smoothed batter. No need to press them in.


In a bowl, combine the 1/3 cup sugar, 1/3 cup flour, cinnamon, 4 Tbsp. butter, and the 1/8 tsp. salt using a pastry blender or your fingers to make a crumbly topping. Sprinkle evenly over the berries.


Place the dish on a baking sheet to prevent any bubbly spills, and bake for about 35 to 40 minutes. Check the buckle early on to make sure the top edges aren't overbrowning. The finished buckle may still look kind of wet in the middle, but that's okay. The sides and bottom of the buckle should be beautifully golden. This is a supermoist dessert that's gooier in the middle. Let it cool for a while on a rack.


It's delicious served warm or cold. Try it with a little unsweetened whipped cream. You'll be in blackberry heaven.


(If you'd like to comment on this post, or to read any existing comments, please click on the purple COMMENTS below!)

Thursday, May 13, 2010

Tart Cherry Frozen Yogurt with Crispy Honey Cookies . . .


Summer--so they say--is briskly approaching, though I must say you'd never know it in south-eastern Michigan this week (please excuse me a minute while I stow away my soggy umbrella and put on a warm sweater). I'm giving this very rainy month of May the benefit of the doubt, though. It seems the least I can do. There are signs everywhere--unmistakable signs--that summer wants to arrive.


What kind of signs, you ask? Well, currently my favorite sign is a devoted mother robin. She built her nest in an ill-advised and completely unguarded location in a slim terracotta flower-pot, which hangs on the wooden fence that borders our driveway. After much quiet sitting on two lovely sky-blue eggs, her babies hatched a few days ago. This morning as I type, the chilly raindrops hammer her with no mercy, yet she remains huddled and completely still over her little birds. It seems she has the faith that she was born with, knowing without a doubt that warm weather is not far away. She's calm and hopeful. I choose to trust her instincts.


So, proceeding on the optimistic assumption that the days of hot sidewalks and lemonade stands aren't too distant, I've made a bright pink, tart-cherry, frozen yogurt. Yes, folks, 'tis the season to dust off your ice-cream maker and begin pondering the gorgeous possibilities for homemade summertime ice creams, sorbets, and fro-yos.


In scouting for the right recipe, I encountered several designed for use with fresh sour cherries; David Lebovitz, for example, has an easy formula in his valuable book, The Perfect Sccop. But I wanted one that called specifically for frozen cherries alone. Early in April, you may recall I mentioned having stumbled upon an extraordinary sale on frozen tart (aka sour-sour-sour!) Michigan cherries. I bought three large bags, used one of them to bake my son Charlie's 17th birthday cherry-lattice pie (which, by the way, was darn good), and stashed the rest in the freezer. Naturally, I wanted to use some of them again.


So, this week, I incorporated them into a cool, fresh, and appealing treat. The frozen yogurt recipe, which I've adapted here, was inspired by a recent post in a beautiful food blog called The Whole Kitchen.

My recipe differs from The Whole Kitchen's in that I used all frozen sour cherries, versus part sour and part sweet; I used superfine sugar instead of making a simple syrup; and I used Chambord raspberry liqueur instead of tequila as the minimal alcohol component. I also adjusted the ingredient proportions a tiny bit. The use of Greek style yogurt, which The Whole Kitchen recommends,  lends an especially pleasant creaminess that wouldn't be so evident with the use of a regular, lower-fat yogurt.

Speaking of cookies . . . 

And what goes better with a small scoop of something sweet and frosty than a charming cookie? Crunchy and wheaty without being overpowering, these lean happily toward the healthier end of the cookie spectrum.


I must admit that I love hard cookies that require a lot of chewing, something I may have divulged to you previously. I'm like a canine with a milk-bone dog biscuit that way. Can't help myself. The longer you bake these, the longer it takes to gnaw on them. (Not into gnawing? Want your cookies softer? Just take them out of the oven before they get too golden, and consider making them a little thicker to start with.)


The  recipe is one that I adapted from King Arthur Flour Whole Grain Baking, a substantial and satisfying volume that I've mentioned before (most recently here, just a couple of weeks ago). I changed it up slightly by substituting a small amount of honey for some of the sugar, and instead of using all  whole wheat flour, which makes for a heavy duty cookie that doesn't always have broad appeal, I used about 60 percent whole wheat with white flour for the balance.


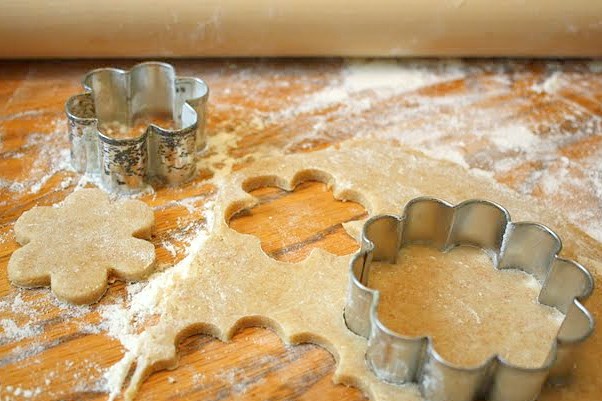
These cookies are rolled out and cut with cookie cutters, but the dough--which must be briefly chilled and is kind of sticky--is very forgiving and can accommodate a good bit of flour to make the rolling and cutting process pain-free.

Happy slurping and crunching! (And bring on summer, please!)

Tart-Cherry Frozen Yogurt

(For a printable version of this recipe, and the cookie recipe below, click here!)

1 cup fully frozen sour cherries
2 and 1/2 cups frozen sour cherries that have been mostly thawed
1 cup superfine sugar
2 cups Greek style yogurt (I used Trader Joe's brand)
2 Tbsp. Chambord raspberry liqueur (or a comparable liqueur like kirsch, for eg.)
Fresh lemon juice to taste (I used at least 2 tsp., maybe more)

In the bowl of a food processor, puree all of the cherries along with the sugar; pulse a few times until well combined.


Add in the yogurt and pulse to combine. Then add in the liqueur and pulse to combine, and add the lemon juice to taste.


Pour the mixture into a container and cover it tightly. Chill it for several hours or overnight in the refrigerator.

Prepare the frozen yogurt in your ice cream maker according to its specific directions. (In my ice cream maker, which is the Kitchen Aid attachment to my mixer, I slowly churned the chilled mixture for 30 minutes. Then I poured it into a glass container, covered it tightly with plastic wrap, and put that in the coldest part of my freezer for at least 24 hours to firm up. The yogurt was nicely scoopable and not too hard when I took it out of the freezer the next day.)


Crunchy Honey Wheat Cookies 

3/4 cup unsalted butter, room temperature
3/4 cup granulated sugar
2 Tbsp. honey
3/4 tsp. salt
1/4 cup orange juice
2 tsp. vanilla extract
1 and 1/4 cups whole wheat flour
3/4 cup All-Purpose white flour
1/2 tsp. baking powder

In the bowl of your mixer, combine the butter, sugar, honey, and salt, then add in the orange juice, vanilla extract, wheat flour, white flour, and baking powder.  Beat until well mixed.

Flatten the dough into 2 equal disks, wrap them in plastic wrap, and chill them in the fridge for 30 minutes or more.

Preheat oven to 350 degrees. Line cookie sheet(s) with parchment paper.

Taking one disk of dough from the fridge at a time, roll the dough out on a floured surface into a circle about 14" in diameter. Use cookie cutters to cut out any shapes you like. It's okay to roll and re-roll the dough scraps. Repeat with the second disk of dough, or freeze it dough for use another time.

Place the pieces on the cookie sheet; they can be fairly close together as they spread very little. Bake them for about 12 to 15 minutes or so, checking them early on. Reverse the tray from front to back in the oven after about 7 minutes for even baking. If you'd like crispier cookies, bake them longer, until they're quite golden. Let them cool on a rack.


(If you'd like to comment on this post, or to read any existing comments, please click on the purple COMMENTS below!)

Wednesday, May 5, 2010

"Be it Ever so Crumbly . . . " Raspberry Almond Crumble Bars


Every once in a while, a casual comment, or perhaps some little household incident, prompts my charming husband to sing Bugs Bunny's version of that noble ode to domestic bliss, "Be it Ever So Humble, There's No Place Like Home." Are you familiar with it? Bugs's rendition went kind of like this:

Be it ever so crumbly, there's no place like Rome.
Nero, he was the emperor, the palace was his home.
But he liked to play with matches, and for a fire yearned.
So he turned Rome to ashes and fiddled while it burned.

Catchy, isn't it?


Well, these raspberry-almond crumble bars prompted just such an occasion for said husband o' mine. Ah, yes, these are crumbly indeed. In fact, the topping is so crumbly, you might as well just haul out the vacuum cleaner right now and leave it in a convenient spot until they're all gone. That's assuming, of course, that you aren't plagued with a debilitating crumb phobia. (In which case, I'll have to excuse you from making these. Just bring in a signed note.)

These bars are chewy, crunchy, and--from the filling up--are on the softer side. To keep them completely in tact you might want to consider refrigerating them. But if you don't mind the hyper-crumble effect, leave them out. Like just about all bar cookies, they freeze well.


About this recipe . . .
 
I adapted this recipe from one called Back-to-School Raspberry Granola Bars that I found in Karen DeMasco and Mindy Fox's 2009 book, The Craft of Baking. I love the looks of almost every single recipe in this volume. I believe I've raved about it before, so I'll try to refrain from gushing.

I made a couple of changes to the recipe that, I strongly suspect, upped the crumbly factor exponentially. Among them, I substituted  almond meal for part of the white flour. And, I used toasted, unblanched almonds, chopped small, instead of the indicated coarsely chopped pecans. Also, I substituted light brown, versus dark brown, sugar, and I increased the recipe so it could be made in a 9" by 13" pan. And, of course, I reworded the instructions.


I assume you can use any jam flavor that appeals to you. I used primarily raspberry, but must admit that I ran a little short of the required amount and ended up slipping in some apricot jam as well. Apricot jam, as we know, has an odd kind of a neutral aspect about it. Bakers and pastry chefs seem to use it in one form or another as a basis for everything from glazes to moistening syrups to fillings. I guess that's because it's cooperative and adaptable, from a flavor standpoint. It has a passive "do with me what you will" quality about it (good characteristic in a jam; bad characteristic in a female).


Raspberry Almond Crumble Bars


(For a printable version of this recipe, click here!)

Preheat oven to 350 degrees. Lightly butter a 9" x 13" pan; line the bottom and sides of the pan with parchment and lightly butter the parchment.

1 and 1/2 cup unsalted butter
1 and 1/4 cup almonds, unblanched
2 cups unbleached All-Purpose flour
1 cup almond meal (Essentially, whole almonds that have been finely ground, but not so fine they become like a paste; I used Trader Joe's brand.)
2 and 1/4 cups rolled oats (I used quick oats; either quick or old fashioned should work fine.)
2/3 cup granulated sugar
2/3 cup light brown sugar, lightly packed
2 tsp. kosher salt (I realize that sounds like a lot; decrease it if you like, but I wouldn't eliminate it altogether.)
1 tsp. baking soda
2 cups raspberry jam

Melt the butter in a saucepan over low heat. Set aside to cool.

Toast the almonds in the oven, spread on a baking sheet in a single layer, for about 8 minutes. Set them aside to cool, them chop them in small, coarse pieces. 

In a large mixing bowl, by hand, mix together the flour, almond meal, oats, the sugars, baking soda, salt, and chopped almonds. Pour in the melted butter, and mix together well with a fork. Feel free to mix with your hands if you want to, to break up big chunks.

Put about 2/3 of the mixture into the prepared baking pan and press it down firmly to create an even well-packed layer. Pour the jam evenly over this, and spread it with a spatula or the back of a large spoon.
Sprinkle the remaining crumbly mixture evenly over the entire top of the jam.

Bake at 350 degrees for about 35 to 40 minutes, until the top is golden brown. Let the bars cool completely, in the pan on a wire rack, before attempting to cut and remove them.


(If you'd like to comment on this post, or to read any existing comments, please click on the purple COMMENTS below!)


Friday, April 30, 2010

He'd Been Known to Bake Bread: Grandpa Joe (Honey Oat Sandwich Bread)


The last few days have been bittersweet, as a very important member of our family passed away on the 26th. My father-in-law, known to us lovingly as Grandpa Joe, left us quietly on Monday morning. A smart, interesting, funny guy who loved a good laugh, he was also distinctive in appearance--large in frame, with a nice face and a snowy white mustache and beard. Meeting him for the first time 20 years ago, I inevitably thought of Santa Claus. He did a lot of smiling that day, and I recall feeling that he was very warm and welcoming to me.


A long-time high school biology teacher and then a counselor, Grandpa Joe never lost his willingness to share knowledge. Just for fun, he enjoyed posing little trivia questions to family members out of the blue. I remember how he'd focus his gaze on me and say very pointedly, "Jane, this one's for you . . ." then he'd let loose with an arcane query on a topic about which I may or may not have had the slightest inkling. If I managed to respond correctly, he'd acknowledge that with a grin and comment, "Not bad, Jane. Not bad."


Oh sure, he'd had a few grouchy moments over the last couple of years as his energy diminished. But now those moments just seem like isolated stitches in the broad colorful fabric of who he was. This is my favorite line excerpted from his obituary, which was written by my husband:  "He loved singing, a good meal, was known to bake bread, and had a wonderful sense of humor." Yeah, the man even liked baking bread. He greatly appreciated well prepared food, loved watching cooking shows, and he read cookbooks. How many fathers-in-law do those things?


And the guy did love to sing. Last Saturday evening, from his hospice bed, he gifted us in a quavering voice with the melody from a couple of old tunes. When asked about his favorite music, he exclaimed over the obvious pre-eminence of Frank Sinatra. What wasn't to love about a man like that?  J.R.R. Tolkien said, "If more of us valued food and cheer and song above hoarded gold, it would be a merrier world." Well, the world will be a little less merry now without Grandpa Joe in it and, somehow, we'll have to pick up the slack.

When I made this loaf of fresh bread the other day, I was thinking of him. I believe he would have liked it.

Love you, Grandpa Joe. See you again someday.


About this recipe . . .

Besides honey and oats, this yeast bread also includes whole wheat- and white flour. It's a dense, moist loaf with a slight and pleasant sweetness. Very easy to make, and probably very difficult to screw up, this a good uncomplicated recipe from the excellent book, King Arthur Flour Whole Grain Baking. I've made at least half a dozen items from this book with fine results each time.


The only change I made to the recipe was to omit nuts from the dough, and I reworded the instructions, throwing in my own two cents here and there. I hope you like this hearty loaf of bread. It's tasty toasted and buttered, but also awfully good untoasted and topped with a little peanut butter. Really satisfying.


Honey Oat Sandwich Bread


(For a printable version of this recipe, click here!)

Lightly grease a standard size loaf pan (9" x 5") and a medium size bowl. 
 
1 and 1/4 cups boiling water
1 cup old-fashioned oats (I only had quick oats on hand so I used those instead)
2 Tbsp. unsalted butter, cut into pieces (okay if it's cold)
1 and 1/2 tsp. salt
1/4 cup honey (I used clover honey)
1 cup traditional whole wheat flour
1 and 2/3 cups unbleached All-Purpose flour
1/4 cup nonfat dry milk (if yours isn't fine and powdery, crush it before adding it in)
2 tsp. instant yeast

In the bowl of your mixer, stir together the water, oats, salt, butter, and honey. Let this cool.


In an ungreased bowl, whisk together the whole wheat flour, white flour, dry milk, and yeast. Pour this into the mixer bowl with the water-oat-honey mixture.


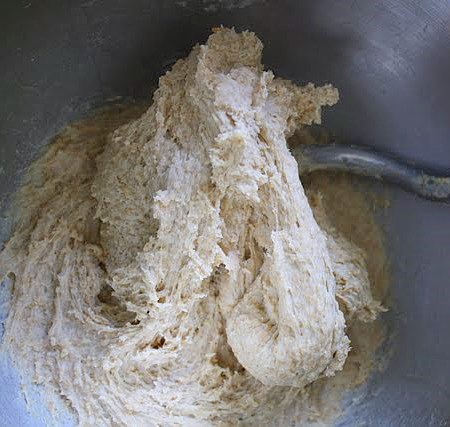
Put the mixer bowl onto the mixer. Using the dough hook, knead until a smooth dough forms (I mixed mine on the lowest speed for about 4 minutes; you may also choose to do this by hand, if you prefer).


Put the dough into the lightly greased medium-size bowl and cover it (I used a clear plastic food-safe box turned upside down to help create a warm moist environment) for about 1 hour, until doubled in bulk.


Once doubled, oil your hands, and thenn deflate the dough gently. (You won't need to do this on a floured surface, believe it or not.)


Shape it into a 9" log, and nestle it into the greased loaf pan.

Cover it with greased plastic wrap, and put it again in a nice proofing environment--someplace kind of warm and not too dry. Let it rise again for at least an hour or more, until it's crowned about 1.5" above the sides of the pan. About half an hour into the rising time, preheat the oven to 350 degrees.


Uncover the risen bread carefully, put it in the oven on the middle rack, and bake it for approximately 40 to 45 minutes. Put a foil tent over the loaf about 20 minutes into baking to prevent overbrowning. Test the bread for doneness by poking it with an instant read thermometer; when the middle of the loaf reads 190 degrees, the loaf is done.


Remove the bread from the oven, and take it out of the pan after 1 minute; put it on a rack to cool. If you like, brush melted butter lightly on the top of the loaf when you remove it from the pan; this will help the top crust stay nice and soft. Cool it on the rack completely before trying to slice it.


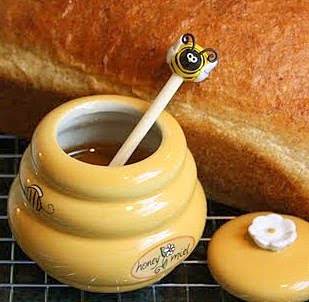
P.S. Did I forget to mention that Grandpa Joe used to keep honey bees? I would give anything to have a picture of him in his bee-keeper suit.


(If you'd like to comment on this post, or to read any existing comments, please click on the purple COMMENTS below!)