Friday, July 27, 2012

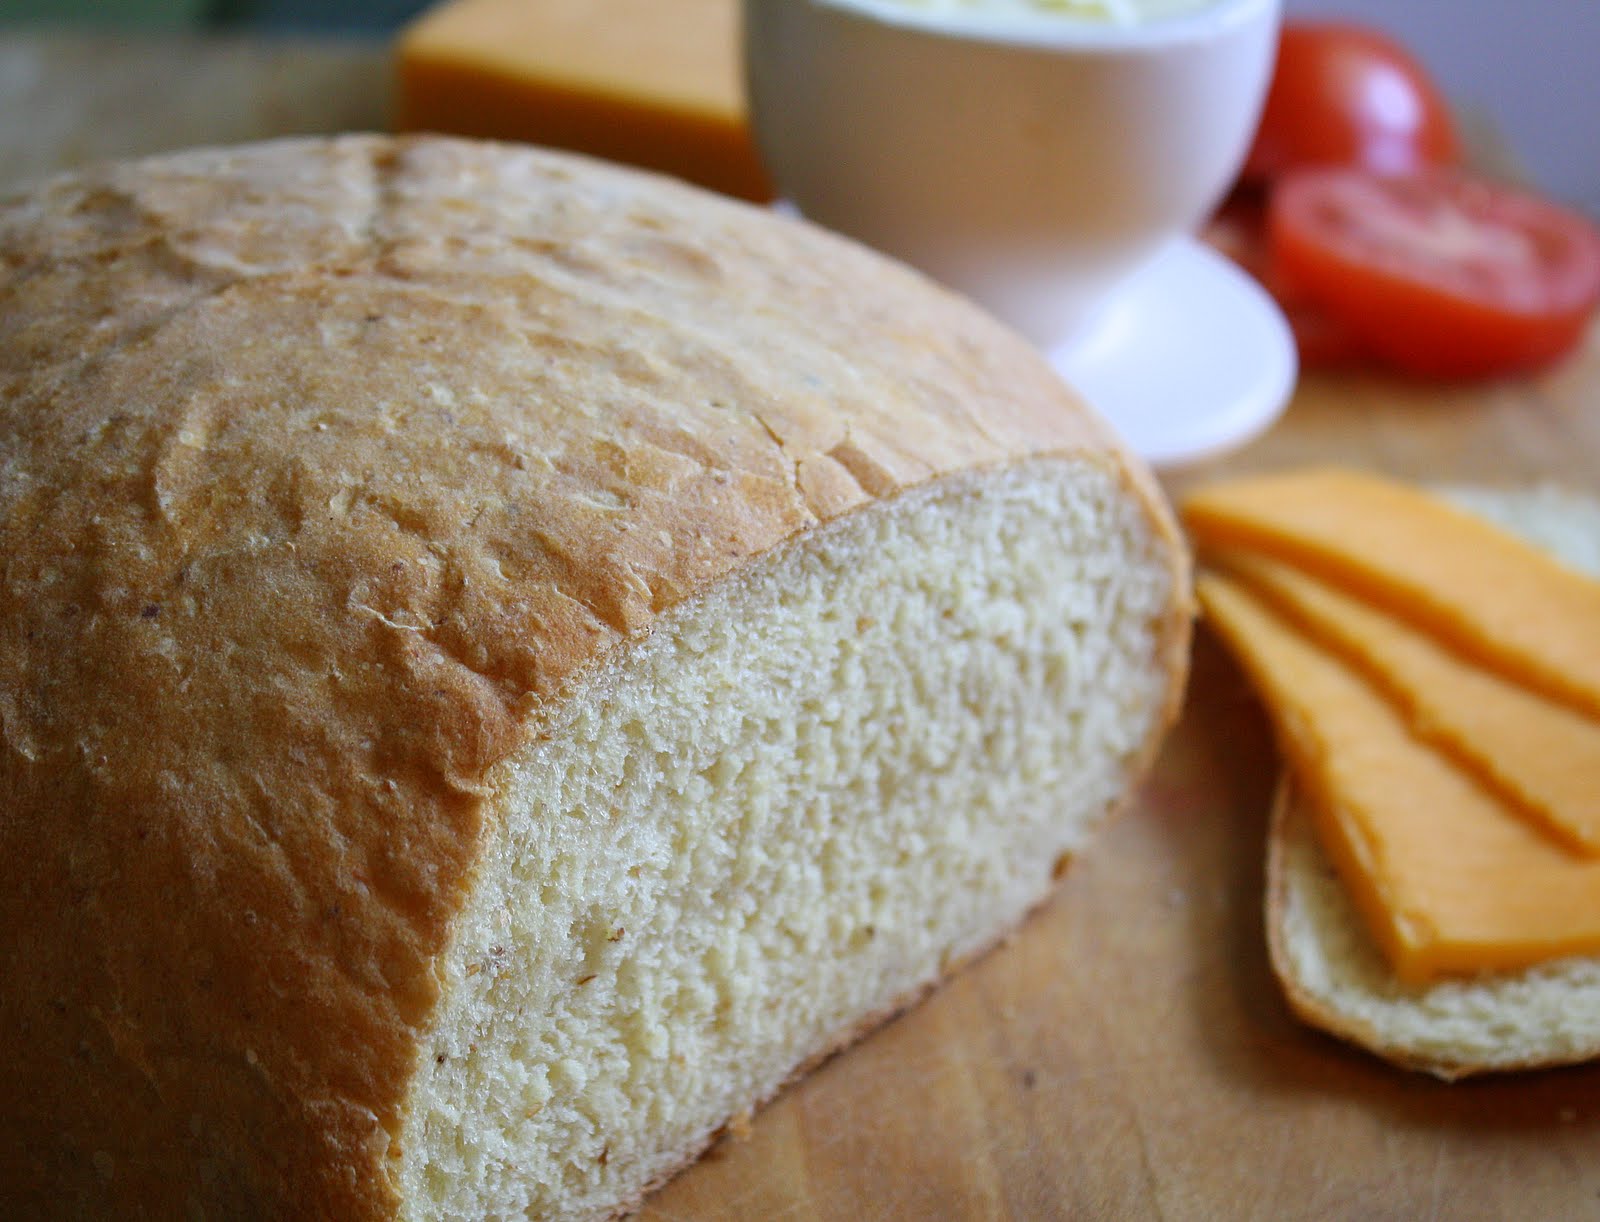
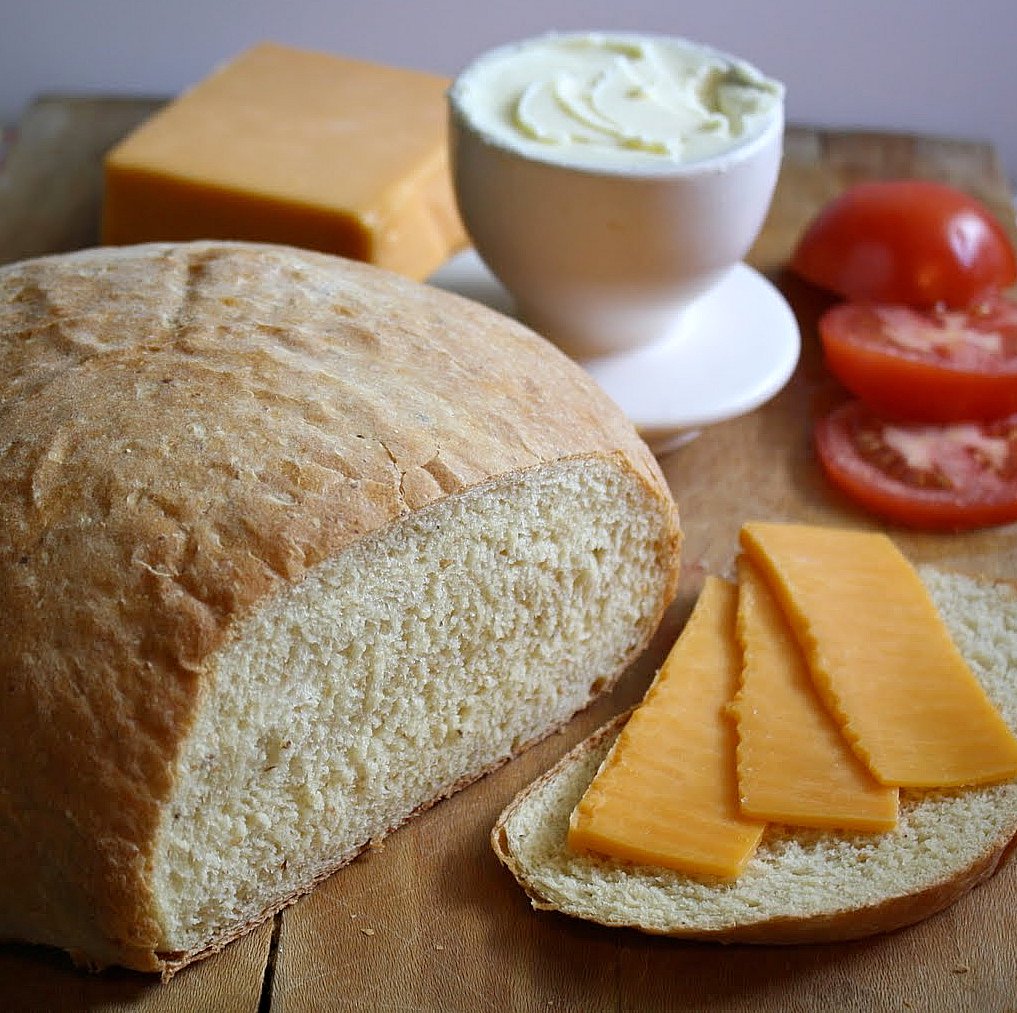
Rustic Country Bread . . . Humble Loaves from Your Two Hands . . . Quietly

Do you ever have days when you want to bake, but you don't feel like making a big racket in the kitchen? You just want to do it quietly, unaccompanied by the clatter of metal pans and the growl of your mixer? Maybe the kids are still asleep and you're relishing the momentary solitude, the morning's so calm and peaceful you can't stand to break the spell. Well, I know just how you feel.


Days like that call for recipes exactly like this one. It's guaranteed not to wake the neighborhood. All you really need for it, once you've measured the ingredients, is two big bowls, a spoon and spatula, a bench scraper or sharp knife, and a good work surface for kneading. That's basically it. Oh, and you'll definitely need your own capable hands because they, my baking friends, are the most critical component. And, thankfully, they're quiet.

Now let's talk about the word "rustic" for a minute. The dictionary defines it in a variety of ways. "Characteristic of, or resembling, country people," "made of rough limbs or trees," and my own personal favorite, "lacking in social graces or polish." I think that last one applies pretty safely here without causing offense. After all, this bread is mixed by hand, shaped by hand, and it'll accept a few customizing tweaks without having a high falutin' hissy fit. It knows it's naturally good, and doesn't have to try too hard.


You can easily whip up a couple of these loaves without feeling afterward like you've just run a race or been on a bad job interview. You know how some recipes kind of make you feel like that? Where you can just tell, about halfway in, that things are not gonna turn out well? With this bread, you don't have to worry. It won't let you down. So slide your dough into the oven and prepare for happiness. Maybe even full-blown joy! At the very least, expect to experience a sense of peaceful contentment in your bread baking powers. And don't forget to enjoy the quiet while it lasts.

About this recipe . . .

Adapted from The Farm Wife blog's formula for "Country White Bread," these loaves can be made panned or unpanned, and will accept modest alterations pretty well. I added in, with the bread flour, a little bit of flax meal, along with a smidgen of wheat bran and wheat germ, to give it a little more character and substance. But I've also made it entirely with white flour, too, and that's a great loaf also.

I love bread that doesn't need to bake in a pan, don't you? I baked these on a stone, but you can certainly bake them atop parchment on a baking sheet.


Rustic Country Bread

(For a printable version of this recipe, click here!)

Yield: Two standard size round loaves

1 and 1/2 cups very warm water (about 120 degrees or so)
1/2 cup milk (I used 2 percent.)
2 tablespoons granulated sugar
2 teaspoons salt (I used coarse kosher salt.)
3 and 1/4 teaspoons instant yeast (I almost always use this kind of instant yeast, which requires no proofing; if you want to use active dry yeast instead you'll need two standard size packets, and you'll want to proof them first in a bit of the warm water before adding that into the bowl.)
6 cups bread flour, and possibly a little more for flouring your work surface
1 and 1/2 tablespoons flax meal
1 tablespoon wheat bran
1 and 1/2 teaspoons wheat germ
2 tablespoons of unsalted butter, softened to room temperature
2 large eggs, lightly beaten

In a large bowl, lightly whisk together the sugar, salt, instant yeast, three cups of the bread flour (only three), the flax meal, wheat bran, and wheat germ. Add the water and milk into this, stirring until very well blended.


Add in the butter and eggs, and stir until fully combined. 


Now, gradually add in about two and one half cups more flour, stirring until the dough looks like a rough shaggy mass that pulls away from the sides of the bowl. 


Scrape the bowl and dump the dough out onto a well floured work surface. (Also flour your hands well, and keep a handful of extra flour nearby for this purpose.) 


Knead the dough until it feels smooth and elastic, working in the final 1/2 cup of flour as you do so; this may take at least five minutes of steady kneading, more or less. 


Use oil, vegetable spray, or shortening to completely coat the inside of another large bowl. Put your dough into it, turning it over once so it's coated all over. Grease/spray etc. one side of a sheet of plastic wrap and use it to cover the bowl, greased side down. Place the bowl in a warm spot and let the dough rise until it has doubled; that should happen within an hour (mine took barely 40 minutes on a hot day). 


Press your fist into the risen dough, here and there, a couple of times to deflate it. Turn the deflated dough over in the bowl and cover it again with the greased plastic wrap. 

Again, let it rise until doubled. And, again, this may take up to an hour depending on how warm your house is. When the dough has doubled, dump it out onto your work surface (only very lightly floured this time) and cut it into two equal parts using your bench scraper or a sharp chef's knife.


Shape each of the two halves into a shallow round, making sure to tightly pinch closed any seams. Sprinkle a very thin layer of cornmeal (or you can use a little flour) onto a couple of parchment sheets. Set the dough rounds on the cornmeal. Cover the dough with greased plastic wrap and let them proof (aka have their final rise) until about doubled. This might take half an hour.   


If you're going to bake the bread on metal baking sheets, preheat the oven to 400 degrees for at least 20 minutes. 

If you're using a ceramic baking stone, preheat the oven to 475 for at least half an hour so the stone can get really hot, then turn the oven down to 400 immediately upon placing the dough into the oven.

If you are using metal sheets, you can just slide the dough, still on its paper, right onto them when you're ready to bake. If you're going to bake on a preheated baking stone, you can still give the dough its final proof on cornmeal over parchment, but then gently move the proofed loaves onto a cornmeal-dusted baker's peel to transfer them to the hot stone (that's what I did).

Before putting the dough into the oven, use a little misting bottle of water (or, if no misting bottle, you can do this by wetting your hands and then gently patting the loaves) to moisten the top of the loaves. This will help prevent the loaves from bursting open as they bake. Also, it's a very good idea to squirt misty water quickly into the oven upon placing the dough in there, creating a nice steamy atmosphere (just don't aim right for the oven light).

Bake the loaves for about 20 to 25 minutes or so, until they're quite golden brown on the top and bottom. (The internal temperature of the loaves should be at least 190 when they're done; if you want to, you can stick a stem thermometer in the bottom of each loaf if you like. Under-baked bread will be noticeably dense/gummy inside, and just feel heavier when you handle it right out of the oven.)

Let the loaves cool on a rack for at least half an hour before slicing. Great for sandwiches, toast, french toast, you name it. Freezes well.


(If you'd like to comment on this post, or to read any existing comments, please click on the purple COMMENTS below.)

Saturday, July 21, 2012

A Midsummer Day's Dream . . . Cream Cheese Nectarine Cake with Crumbly Streusel


Nectarines . . . really fine, really sweet nectarines. Not something one can necessarily count on finding here in Michigan. Usually, though, that doesn't matter. Why? Because typically, in mid-July, we're wallowing in a surplus of glorious local cherries, baking them into this and stirring them into that, not giving those pretty nectarines from out of state a second thought. But late winter weather played holy havoc with Michigan's cherry orchards this year, leaving us with the most pathetic harvest in decades. Trees that would normally be bending under the weight of crimson fruit look instead as if they've been ever so lightly dotted with red.  Just a cherry here, a cherry there. Sorry, folks--forget about "pickin' your own" and keep your fingers crossed for next year.


No home-grown cherries? For born and bred Michiganders that scenario is virtually unheard of. So, nothing left to do but rev up the contingency plans. Time to focus on nectarines instead, nectarines that hail inevitably from elsewhere. A sobering thought, no doubt. Miraculously, though, they're incredibly sweet and more than up to snuff. I've been shocked by their quality, thus I've been munching them the last few days with an unbridled sense of righteous privilege, like a koala in a eucalyptus tree. Don't try to stop me.


About this recipe . . . 


I adapted this from The Grand Central Baking Book, by Piper Davis and Ellen Jackson (I love this book, by the way, and recommend it). I started with their recipe for a cream cheese apple cake, but made some significant tweaks.

First, I reduced the overall size of the recipe by about one third, from one that would produce a large 12" bundt cake down to a reasonably sized 9" round cake made in springform pan. I used a relatively small amount of chopped ripe nectarines, unpeeled, in the batter versus a sizable portion of peeled apples. I added in a modest amount of almond flour/meal (if you can't find it in your usual grocery store, check at Trader Joe's, Whole Foods, or health food stores), which lends a subtle richness to the texture without adding any overt almond flavor. I upped the amount of vanilla, in fact using vanilla bean paste instead of extract, and I also fiddled with the proportion of cinnamon. 


The addition of a streusel topping worked out well, too; I just threw together flour, sugar, almond flour/meal, cold butter, and a pinch of fine sea salt and went at it with a pastry blender. You can count on a cake that happily straddles the fence between a coffee cake and a not-too-dense pound cake. A great cake overall, even without our beloved Michigan cherries.


Cream Cheese Nectarine Cake with Crumbly Streusel


(For a printable version of this recipe, click here!)

Yield: About 16 slices

For the cake:
2 and 1/2 cups unbleached all-purpose flour
1/2 cup almond flour/meal
1 teaspoon baking powder
2/3 teaspoon coarse kosher salt
1/2 teaspoon ground cinnamon
2/3 cup unsalted butter, softened (that's one stick and about 2.5 tablespoons)
8 oz. cream cheese
2 cups granulated sugar
3 large eggs, room temperature
1 and 1/2 teaspoons vanilla bean paste (or vanilla extract)
1 extra-large ripe nectarine, unpeeled, pitted, and chopped into very small pieces

For the streusel:
1/3 cup granulated sugar
1/2 cup almond meal/flour
1/4 cup unbleached all-purpose flour
5 tablespoons of cold, unsalted butter, cut into small chunks
1 pinch fine-grain sea salt

Preheat your oven to 350 degrees. Grease and flour a 9" springform pan.

Make the streusel first:

In a medium bowl, whisk together the sugar, almond meal/flour, and all purpose flour. Toss in the butter chunks and combine with a pastry blender or a fork until most of the mixture is in pieces approximately the size of a large pea. Cover the bowl and put it in the fridge.

To make the cake batter:

In a medium bowl, lightly whisk together the flour, almond flour/meal, baking powder, salt, and cinnamon. Set aside.

In the large bowl of your mixer, using the paddle attachment on medium-high speed, beat together the butter, cream cheese, and sugar until the mixture is fluffy and light in color (beat for at least five minutes and as long as eight). On low speed, add in all of the vanilla, and add the eggs one at a time, beating well after each one. Stop and scrape the bowl and paddle periodically.

Still on low speed, add in all of the nectarine pieces, beating just for a few seconds to combine, then add in all of the dry ingredients. Mix only until the flour looks completely incorporated. Scrape all the batter into your greased and floured cake pan. Sprinkle all of the streusel evenly over the top.

Bake the cake on the middle rack of the oven for about 55-65 minutes. You'll know it's done when the top is lightly golden, the sides are just beginning to pull away from the pan, the top of the cake doesn't jiggle at all when you move it, and a toothpick inserted in the center come out mostly dry. Check your cake after about 40 minutes and if it appears to be browning too fast, lay a piece of foil loosely over the top. Let the finished cake cool in its pan on a rack for at least 15 minutes, then run a thin knife around the sides, remove the springform carefully, and let the cake finish cooling on the rack.


(If you'd like to comment on this post, or to read any existing comments, please click on the purple COMMENTS below.)

Sunday, July 1, 2012

ANZAC Cookies: Tough, Tender, & Time-Tested


Some things are designed  to be sturdy and resilient, to travel well, and to require no special handling. Rucksacks, helmets, and combat boots come to mind. But one doesn't normally associate a cookie with those particular qualities. Interesting, then, that just such rough and tumble characteristics rightly belong to this chewy little cookie. Containing no eggs and not prone to crumbling, they hold up well in transit and are palatable for a good while after being baked.


Featuring dessicated coconut, oats, and that beautiful concoction Lyle's Golden Syrup, ANZAC cookies/biscuits (they're named for the Australia New Zealand Army Corps) gained popularity during World War I. Wives, moms, and girlfriends prepared them for their loved ones in the service far away. Can't you just picture a tired young soldier unwrappping a parcel from home, only to find a couple dozen of these fragrant cookies snugly packed inside, along with a nice long letter? It's no wonder they've withstood the test of time.


And besides boasting a strong constitution, these cookies have a lush buttery flavor. They're just plain delicious. Try one dipped into a cold glass of milk, tucked into a scoop of chocolate ice cream, or served alongside a bright bowl of fruit sorbet.

About this recipe . . . 

From Alice Medrich's irresistible book, Chewy Gooey Crispy Crunchy Melt-In-Your-Mouth Cookies, this is my formula of choice for this legendary cookie. (My only adaptions were to double the recipe and rewrite the instructions to reflect what I actually did). I doubt this recipe could be improved upon. It's so good as it is. You can always trust Alice's recipes. That gal really knows her stuff.


ANZAC Cookies

(For a printable version of this recipe, click here!)


2 cups rolled oats (I happened to use quick oats.)
2 sticks (1 cup) unsalted butter
1 and 1/2 cups granulated sugar
2 tablespoons water
4 tablespoons (1/4 cup) Lyle's Golden Syrup (You can substitute honey, per Alice, but I have to believe these taste best made with Lyle's.)
2 cups all-purpose flour (I used unbleached, and whisked it lightly before measuring.) 
2 teaspoons cream of tartar
1 teaspoon baking soda
2 cups dessicated coconut (This is coconut that's dried, shredded small, and unsweetened; readily available in health food stores if you can't find it in a regular grocery store.)


In the large bowl of your food processor, pulse the oats for a few seconds, until coarsely ground but not powdery. 

In a large mixing bowl, by hand, combine the ground oats along with the flour, cream of tartar, baking soda, and salt. Set aside.


In a large pot (I used a dutch oven) set over low heat, stir together the butter, sugar, water, and golden syrup until the butter is melted. Add in all of the dry ingredients, and stir until it's entirely combined. 


Divide the dough into four equal parts and form each one into a log about 2 inches in diameter. Roll each log snugly in parchment paper and chill in the refrigerator for a couple of hours, or overnight. 


When you're ready to bake the cookies, preheat your oven to 325 degrees. Line a couple of cookie sheets with parchment. Removing one chilled log from the fridge at a time, slice the cookies to a thickness of no more than 1/2 an inch with a very sharp knife; if the dough crumbles on the edges as you slice, press it back together with your fingers. Lay the cookies about 1 inch apart on the parchment lined cookie sheets. 


Bake the cookies for approximately 15 minutes, until they're golden on the bottom and lightly golden on top. Rotate the sheets in the oven half-way through for even baking. Let the finished cookies cool on their pans for a few minutes. (They'll be firm enough to handle relatively quickly, but will still be kind of soft and chewy at first. They'll be much firmer after a few hours and that's when you'll realize why they're famous for their sturdy constitution!) 


(If you'd like to comment on this post, or to read any existing comments, please click on the purple COMMENTS below.)

Saturday, June 23, 2012

Homemade Hamburger Buns: As the Suit Makes the Man, so the Bun Makes the Burger


It's hard to predict what Andy, my husband, will say he feels like having for dinner on any given occasion, mostly because he's so flexible and cooperative where culinary pursuits are involved. He  rarely backs away from any dish he's presented with. So, last weekend, I don't know whether I was surprised or nonplussed by the fact that he requested nothing more exotic than hamburgers for his Father's Day dinner. After he told me that, though, I immediately understood that he was hatching a plan; there had to be something unique about those burgers.

 
Turned out I was right. The burgers would be painstakingly prepared from an interesting mixture of three cuts of beef--brisket, chuck, and beef short ribs--making homemade buns a natural requirement. Andy carefully selected the meat himself from a butcher the day before it was to be cooked. He took it right home, sharpened his chef's knife, and with surgical precision trimmed just the right amount of the fat, cut the meat into chunks, and then semi-froze them. Once the pieces were firm but not rock solid, he ground them using the meat-grinding attachment that hooks onto my beloved red mixer (oh yes, he sanitized my baby thoroughly when he was done). No herbs, spices, or flavorings were added, mind you--not even salt or pepper. Just the unadorned, unadulterated meat. 

 
On Father's Day, he grilled those burgers for us with the utmost care, and they were a sight to behold. Now, I'm not exactly a diehard fan of any kind of meat. In fact, I don't think it would be hyperbole for me to say I am often indifferent to it. You'll never catch me prowling through meat-centric blogs or waxing rhapsodic about the delicious bone marrow I sampled at a fancy restaurant (involuntary shudder), that's for sure. But, give me a well assembled, expertly grilled hamburger made from sensational stuff and you'll get a noticeable reaction out of me. Maybe even a deeply sincere, "Yummmmm."

Anyway, we placed those hot, glistening patties tenderly atop the classic hamburger buns that I'd baked fresh the same day and, served with coleslaw, a few crunchy chips, and rosy-red watermelon slices, it all made for a fine and unfussy Father's Day supper, I must say. (Gosh. Maybe I actually like meat more than I thought?)

 
About this recipe . . . 

You might say this burger bun recipe came to me, typed on an old index card, from my late mom (that would be Stella, 1927-2006; honestly, that woman just baked non-stop). Her little handwritten note on the back indicates she first found it in a 1955 Better Homes and Gardens pamphlet called "America's Best Homemade Pies, Cakes and Breads." Her recipe as written would have produced enough for a starving battalion so I reduced the yield down to one dozen standard-size buns, and I fiddled with the method just a tiny bit. 

 
This is a nice, soft, all-purpose burger/sandwich bun with a slightly detectable sweetness, a smooth crumb, and it's sturdy enough to perform its duty admirably. It won't fall apart even if you stack your juicy burger with loads of condiments. These freeze well, too.

Classic Homemade Hamburger Buns
(For a printable version of this recipe, click here!)

Ingredients:
4 cups unbleached all-purpose flour, lightly whisked or sifted after measuring
2 and 1/4 teaspoons instant yeast (no need to proof instant yeast)
1 cup warm water
3 oz. vegetable oil
1/4 cup granulated sugar
1/2 tablespoon coarse kosher salt
2 medium size eggs, lightly beaten (or 1 and 1/2 large eggs)

2 tablespoons melted butter, to brush atop unbaked buns

In the large bowl of your mixer, using the paddle attachment, combine two cups of the flour and yeast on low speed for several seconds. In a medium bowl, by hand, stir together the warm water, oil, eggs, sugar, and salt. Add this into the mixer bowl. Beat on low speed for about 30 seconds; stop and scrape the bowl and beaters, then increase the speed to medium and beat for 3 more minutes, again stopping to scrape as needed. 

Remove the mixer bowl from the mixer and stir in the remaining flour by hand. If it's extremely soft and still almost liquidy, add in a little more flour, one tablespoon at a time until it seems more workable. Dump the dough out onto a well floured work surface and knead it until it feels smooth and elastic. 


Put the ball of dough into a large bowl that's been oiled or sprayed with vegetable spray. Turn the dough over so it's completely coated. Cover the bowl with a piece of oiled/sprayed plastic wrap. Cover that with a thin dish towel, and place the bowl in a relatively warm spot. Let the dough rise until it's about doubled, perhaps one hour or so. (This is kind of a rich yeast dough--what with the amount of eggs, oil, and sugar it contains--so don't worry if you don't see a quick dramatic rise the way you probably would with a leaner white bread dough. Rich doughs are more subtle in this respect.)

Cover two half-sheet pans with parchment paper.

Deflate the risen dough on a very lightly floured surface. Divide it into three equal portions using a bench knife, or a very sharp chef's knife. Cut each portion into four pieces. Cover the pieces with a sheet of sprayed plastic wrap and let them rest for about ten minutes. 


Uncover them and shape each one them into a smooth ball by rolling it in a small circular motion on your work surface, held gently beneath your closed fingers and palm. Tightly pinch closed any seam on the bottom. Place six buns on each of the two half-sheet pans. Press them down into 3 and 1/2 inch circles. 


Cover them again with the sprayed plastic wrap and a light dishcloth and put them in a warm spot. Preheat your oven to 375 degrees, and let the buns rise for about half an hour as the oven heats up. 

Just before placing the risen buns into the oven, brush the top of each one with melted, unsalted butter.


The buns will bake quickly. Peek at them after about ten minutes. Take them out when the tops are golden and the bottoms are deeply golden. 


Let them cool completely, on a rack, before slicing them for burgers. 


(If you'd like to comment on this post, or to read any existing comments, please click on the purple COMMENTS below.)

Monday, June 18, 2012

Layered Apricot Bars . . . and Going with the Flow


Well, I feel like it's officially summer now. The weather's been astoundingly pleasant. Robins and sparrows convene daily for a splash in our bird bath. Jittery black squirrels, which seem to have multiplied overnight, dash in circles around our backyard every morning, just like little kids.

 On the human front, my younger son finished his sophomore year of high school last week and my older son is finally back home after a challenging freshman year in college; their relief is palpable.

My husband, who likes to paint in his precious spare time, has lately been setting up his easel in the backyard. He looks so calm and content with a paintbrush in his hand.


This kind of thing, taken in total, gives me a quiet sense of confirmation that, for the moment at least, all is perfectly well in our little nest. However fragile, however fleeting, these delicate moments of complete satisfaction with life are what it's all about. Maybe it's a mom thing. Or maybe not . . . do you find that to be true as well?


And despite the increasingly warm weather, I find myself in the last week or so more interested than ever in baking. It's like something about the four of us being all together again has suddenly caused my nesting instincts to ramp up, so I figure I'm just going to go with the flow.

Gonna bake whenever the spirit moves me, and if I want to bake something odd or old-fashioned or outrageous or boring, well, that's all fine. This summer, as a baker, I think I'm just gonna let my freak flag fly.

 About this recipe . . .

Adapted from this Hungarian apricot bar recipe on Chowhound, this makes a big, big pan of bars! I added candied ginger and ground cinnamon, used toasted pecans instead of walnuts, and fiddled with the method somewhat. I also added a little lemon juice and sugar into the apricot filling formula. This recipe is kind of labor intensive for a bar, what with the rolling out of the three soft dough layers, but I thought it was worth the time and effort.

Layered Apricot Bars with Candied Ginger
(For a printable version of this recipe, click here!)

Yield: 1 half-sheet pan (18" x 13") lined with parchment paper cut to fit the bottom of the pan without extending up the sides

Ingredients for the apricot filling:
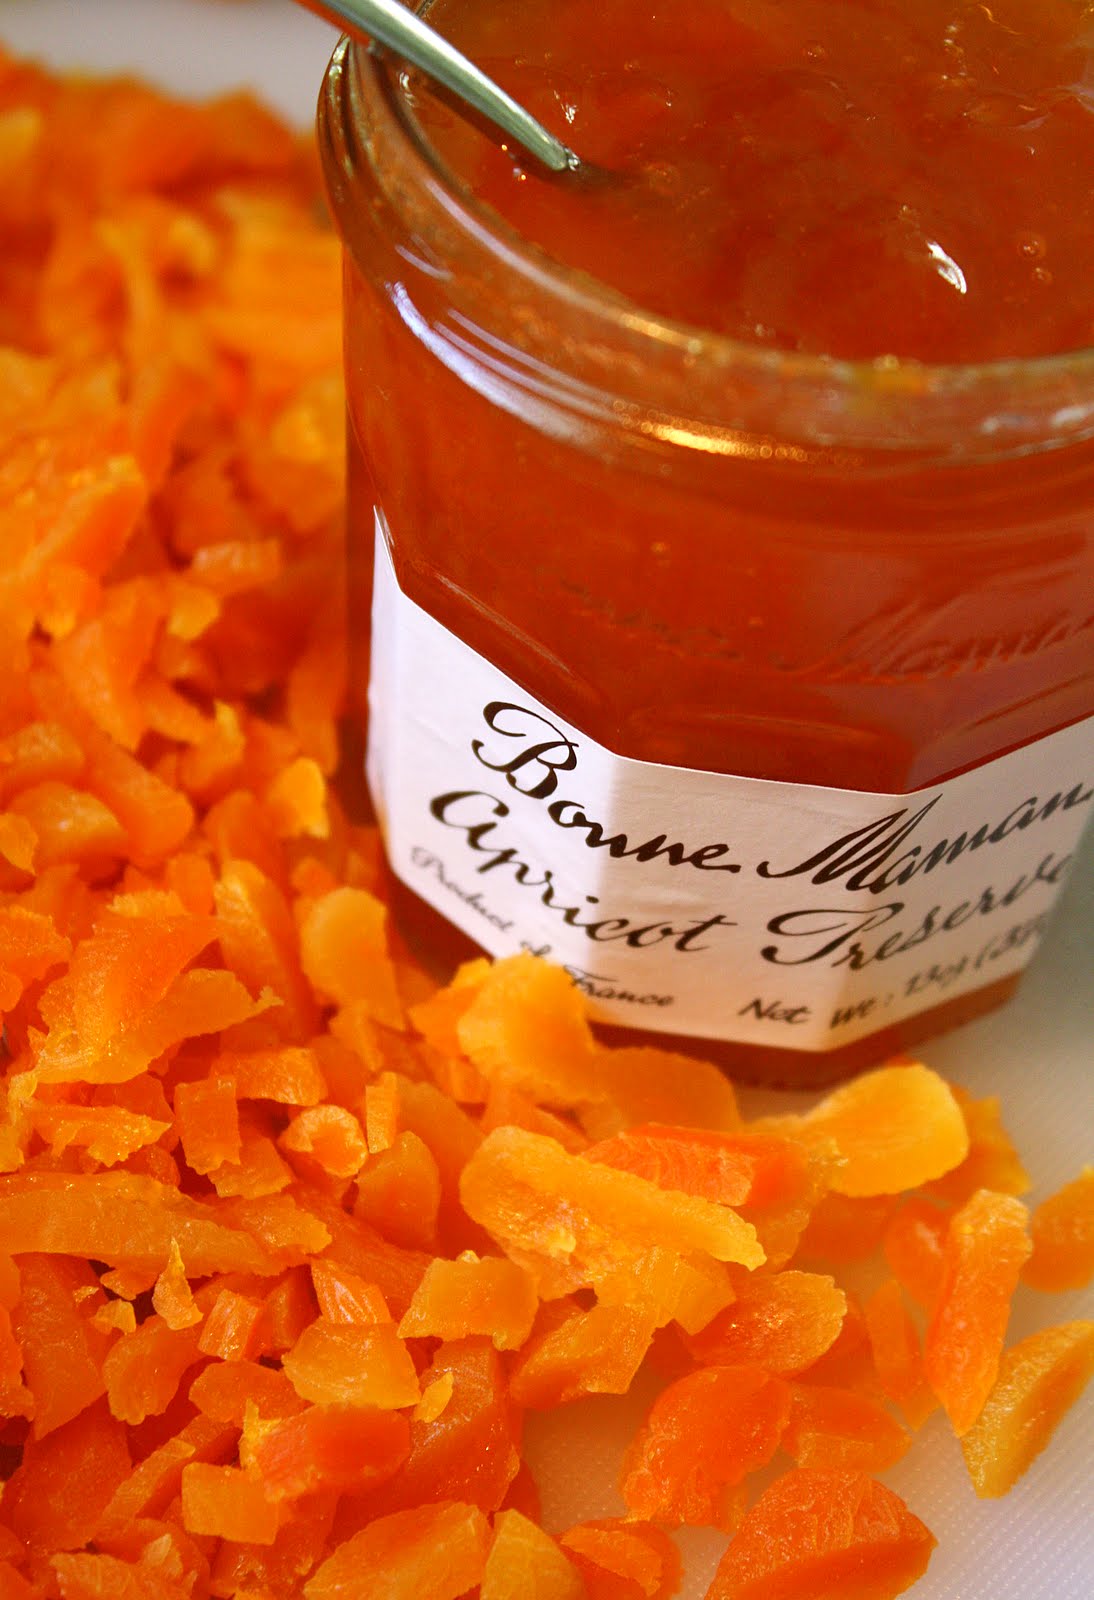
12 oz. dried apricots, chopped small
12 oz. good quality apricot preserves
1 cup water
1 tablespoon granulated sugar
1 tablespoon fresh-squeezed lemon juice

Ingredients for the dough:
5 cups unbleached all-purpose flour
1 cup granulated sugar
1 tablespoon and 1 teaspoon baking powder
2 teaspoons baking soda
1 teaspoon coarse kosher salt

8 oz. unsalted butter, softened but not warm
3 tablespoons vegetable shortening
Yolks of 4 large eggs
1 cup thick sour cream
1 teaspoon vanilla extract or vanilla bean paste


Ingredients for the mixture of sugar and nuts:

1 and 3/4 cups toasted pecans, chopped small
1/2 cup granulated sugar
1 tablespoon finely chopped candied ginger
1/4 teaspoon ground cinnamon

Make the apricot filling first:
Simmer all of the filling ingredients together in a medium size saucepan until thick and bubbly. Keep the fire medium-low so it doesn't burn, and stir the contents frequently. Set aside to cool.


Prepare the sugar and nut mixture next.

In a small bowl, stir together all ingredients for the sugar and nut mixture; set aside.

Make the dough:
In a large bowl, whisk together the flour, sugar, baking powder, baking soda, and salt.

In the large bowl of your mixer, on low speed, mix together the butter, shortening, egg yolks, sour cream, and vanilla until well combined. Add all of this into the bowl of dry ingredients and stir it in. Divide the dough into equal thirds. Wrap each piece in plastic wrap and chill it in the fridge for about 20 minutes.


Preheat your oven to 350 degrees.

Take one piece of dough from the fridge and roll it out onto the parchment paper from your pan. Try to roll the dough as close to the edges of the pan as you can. Use flour on your rolling pin and sprinkle it lightly on the dough as needed. The dough may be quite soft and sticky.

After the dough is rolled out, place it, still on the paper, into the pan. Spread about two thirds of the sugar and nut mixture evenly over the top. Remove another piece of dough from the fridge. Scatter chunks of it on top of the nut layer. Flour your rolling pin again (reflouring it as needed), and roll the chunks of dough out as best you can over that; this layer of dough may look patchy here and there (as shown in the picture below) but that's okay.


Spread all of the apricot filling evenly on top of the layer of dough.


Now, on a well floured piece of parchment, roll out the remaining piece of dough. Make it the same size as the sheet pan; this is the piece you will end up cutting into strips to make the faux-lattice design. Once rolled out, use a pizza/pastry wheel to evenly divide the strips length-wise. Try to make each strip about one inch wide; try to get about 16 strips in all. Carefully lift the strips evenly lay the long ones first atop the apricot layer; use about 6 of them. Cut the remaining strips so they're about 14 inches long, and lay about 10 of them, perpendicular, over the long strips.


Over the top of the lattice, scatter the remainder of the nut and sugar mixture.


Bake the bars for about 30 minutes, until they're nicely golden on top.


Cool them completely on a rack before cutting them and attempting to remove them from the pan. They'll hold up well for a few days, if you keep them covered, before they start to dry out. (Store any leftover bars, as soon as they're cool, well wrapped in the freezer.)


(If you'd like to comment on this post, or to read any existing comments, please click the purple COMMENTS below.)