Friday, April 29, 2011

Vidalia Onion Tarts with Smoked Bacon . . . Relying on the Kindness of Onions


"Life is like an onion: You peel it off one layer at a time, and sometimes you weep." -- Carl Sandburg (1878-1967)

This time of year, is there anything lovelier than a lustrous and golden Vidalia onion? The moist heft and smooth skin of the typical one-pounder naturally appeals to us. It's fresh and ripe in a way that most onions can only dream about. The way in which the Vidalias show up just once a year, have their coming-out party, and then, for the most part, quietly recede into the background endears us to them. They're similar to the New England cranberry crop in that respect--fragile in their brief longevity, and very distinctly American.


One could say that Vidalias didn't appear on the scene by design; they just happened. They were in fact a fluke, planted by a Depression-era Georgia farmer (Mr. Moses Coleman) who didn't get quite what he expected upon tasting his onion crop in 1931. Onions weren't supposed to be sweet! Who'd want a sweet onion? Indeed. Turned out everybody wanted a sweet onion. And they still do.


Personally, I tend to feel that Vidalias are the most cooperative member of the allium family (allium cepa vidalia, to be specific). They kindly refrain from burning my eyes when I slice them. Despite their rather forward juiciness, they shy away from causing discomfort. Most vegetables aren't that thoughtful. That fact alone sets the Vidalia apart from its less civilized and more barbaric cousins, as far as I'm concerned. How can you not love an onion that cares about your feelings? I mean, really.


Some folks even claim you can bite into one and munch it like an apple. Not sure I'm quite brave enough to try that just yet . . . but maybe one of these days I'll give it a go.


About this recipe . . . 

One of my favorite pastry chefs, Nick Malgieri, has published at least two onion-tart recipes over the years that are very similar. This particular recipe, which he calls Swiss onion tart, is adapted from his book The Modern Baker; it is the less rich of the two I am familiar with (the other recipe, which calls for lard in the crust and higher quantities of eggs and cream, appears as Alsatian onion tart in an earlier book, A Baker's Tour).


Malgieri notes that he doesn't like to use onions that are sweet in this type of tart, but I have to disagree. I thought it was the perfect venue for beautiful sugary Vidalias. (This is blog is called Jane's Sweets, after all.) I reworded the instructions to reflect exactly what I did when I made these.


This satisfying little tart makes a nice main dish for a light lunch, alongside a spring-greens salad, and a thick wedge of melon. I can even see packing these tarts into a picnic basket.

Vidalia Onion Tart with Smoked Bacon
(For a printable version of this recipe, click here!)

Yield: Eight individual small tarts, or one large 10" - 12" tart

Ingredients for the tart dough:
1 and 1/2 cups all-purpose flour (I used unbleached.)
1/2 tsp. salt (I used sea salt.)
1 tsp. baking powder
10 Tbsp. unsalted butter, very cold, cut into chunks
1 large egg
1 large egg yolk

To make the tart dough: 
In the large bowl of a food processor fitted with the metal blade, combine the flour, salt, and baking soda. Add into that the butter chunks, and pulse about 20 times until finely mixed.


Add in the egg and the egg yolk; pulse just until the dough begins to form into a ball.


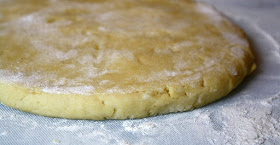
Dump the dough out onto a lightly floured surface, gather it together, and press it into a round disk about 1/2" in thickness.


Cover the disk with plastic wrap and refrigerate it for one hour before rolling out. 

Ingredients for the filling:
6 or 7 strips of thick cut smoked bacon, cooked until crisp (Be sure to make enough to equal 1/2 cup when fully cooked, well drained, and diced. Leave a very small amount of the bacon fat in the pan you used to cook the bacon; you'll use the same pan to cook the onions.)
3 Tbsp. butter, unsalted
1 and 1/2 lbs. Vidalia onions, peeled, halved, and sliced 1/4" thick
Salt (I used sea salt.)
1 Tbsp. all-purpose flour (I used unbleached.)
1/2 cup milk (I used 2 percent.)
1/2 heavy cream
Fresh ground black pepper
Fresh ground nutmeg (Don't use too much. Seriously.)
3 eggs, large


In the same pan that you used to make the bacon, melt the butter on medium heat. Add in all of the onions and generously salt them. When they begin to sizzle, lower the heat, and cover the pan. Cook for 20 minutes, stirring now and then; you want the onions to exude most of their water. Remove the lid, and continue to let the onions cook slowly for about 20 more minutes. They should be golden and quite reduced (aka caramelized!). When they're done, set them aside in the pan.


Preheat the oven to 350 degrees. Remove the dough from the fridge and cut it, pie style, into as many pieces as you'll need (eight equal sections for eight small tart pans, etc.), shaping each piece into a small disk. On a floured surface, using a floured rolling pin, roll each piece of dough out one at a time into a circle a little larger than your tart pan. Gently press the rolled piece down into the pan (best to use tart pans with removable bottoms) without stretching the dough.


Run the rolling pin right over the top; it will cut off the overhanging dough to give each tart a clean edge. Do this for all of your tarts. Put the tart shells onto a baking sheet.

In a large mixing bowl, place the 1 Tbsp. flour. Pouring slowly, whisk in the milk first, and then the cream. Stir in all of the cooked onions, excluding any extra drippings from the pan. Add salt, pepper, and a scant pinch of nutmeg to taste. Whisk the eggs in a small bowl with a fork, then add them in as well. Stir well to completely combine.


Portion the filling into each tart shell evenly (I used a small ladle to do this), making sure to put some onions into each one. Sprinkle bacon over the top of each tart.


Bake the tarts, on the baking sheet, for approximately 30 minutes, or until golden all over.


Let the tarts cool slightly before removing them carefully from their pans. Leftover tarts reheat well in the oven or microwave and can be  refrigerated for a couple of days without losing their gusto.

(If you'd like to comment on this post, or to read any existing comments, please click on the purple COMMENTS below!)

Thursday, April 21, 2011

Brie Cheesecake with Shortbread Crust and Strawberry Sauce . . . (Step aside, Chocolate Bunny.)

Dear Chocolate Bunny,

Your appeal is undeniable. No question about it. You've shown up faithfully, year after year, in Easter baskets across the continent. Though your crinkly pastel foil is often askew, you'll always be a snappy dresser in our eyes. We love you, it's true. But, this year,  we're opting for the cheesecake with strawberries on top. 

Hey, you had a great run, but isn't it time to take a break? Maybe reassess your career goals? Think about it, won't you?

Fondly,
 Jane

P.S. The truth can hurt, I know. But I had to give it to you straight.

About this recipe . . . 

Don't be thrown by the presence of the brie in this voluptuously rich cheesecake. It's a secret ingredient that pretty much stays hidden.

I was a bit concerned, while mixing the filling, that the brie's edgy bitterness might lend an odd aspect to the flavor of the baked cake, but that didn't happen. Which, I suppose, begs the question: Why even use the brie? Why not just use all cream cheese? After all, a wedge of high-quality brie costs a heck of a lot more than a brick of good cream cheese. So what's the point of the brie? Hmmm. Well, honestly, I'm not sure. The texture of this cake is beautiful, but is that necessarily because of the brie? I don't think so.


Would this dessert have been any less wunderbar had I used all cream cheese, instead of the called-for cream cheese and brie combo? Seems like further research is the only thing that might solve the mystery. Perhaps we'll do a double-blind study. Shall I apply for government funding?


Anyway, I found the recipe here, in a Wisconsin milk industry site. For the crust, I decided not to use their graham cracker version so I winged my own, using some homemade shortbread cookies I had in my freezer, and adding in the usual suspects (melted butter, sugar) along with a scant pinch of salt and an even tinier pinch of cinnamon. The fresh strawberry sauce is so simple, I just improvised that one, too.


Brie Cheesecake with Shortbread-Crumb Crust 
and Fresh Strawberry Sauce

(For a printable version of this recipe, click here!)

Preheat oven to 300 degrees. Wrap the bottom and sides of a 10" spring-form pan in heavy duty foil. Have a large shallow roasting pan, or a 12" to 14"-round cake pan, on hand to use for the water bath.The use of a water bath helps prevent the top of the baked cheesecake from cracking. Have a tea kettle full of water on hand as well. You'll need to boil the water shortly before you put the cheesecake in the oven to bake.

For the crust:
1 and 1/4 cup finely ground shortbread cookie crumbs
1/3 cup almond meal (finely ground blanched almonds)
1/4 cup granulated sugar
1/3 cup unsalted butter, melted
1 scant pinch coarse kosher salt
1 tiny pinch ground cinnamon


For the filling:
16 oz (1 lb). cream cheese, softened to warm room temperature
10 oz brie; rind completely cut off, and cheese softened to warm room temperature
1 cup granulated sugar
Seeds scraped from 1 vanilla bean (I used a Madagascar bean.)
3 large eggs, room temperature (not at all cool)
3/4 cup heavy cream (not ice cold)

For the sauce:
1 pint ripe strawberries; hulled, cleaned, and quartered
1 pint ripe strawberries; hulled, cleaned, and halved
3 to 6 Tbsp granulated sugar
1/2 tsp fresh lemon juice

To make the crust:
In a medium size bowl, mix together all of the dry ingredients.


Add in the melted butter, and mix together using a fork until the crumbs are well coated.


Dump the crumbs into the spring-form pan. Press the crumbs evenly and firmly onto the bottom of the pan and an inch or so up the sides.


To make the filling:
In the large bowl of your mixer, on its lowest speed, mix together the brie, cream cheese, and sugar, and vanilla seeds. Mix until smooth.


Still on the lowest speed, mix in the eggs one at a time. Make sure each egg appears well incorporated before adding the next one. The batter should look quite smooth when you're done adding in the eggs.


Slowly add in the cream, mixing just until well combined, still on the lowest speed.


Pour the batter into the crust in the foil-wrapped pan.


Lift the pan off of your work surface by an inch or two and drop it one or twice, or hold onto it and bang it straight down. This helps allow air bubbles hiding within the batter to float up and be released before baking.

Don't forget, also, to start some water boiling on the stove shortly before you need to put the cake in the oven.


Place the foil-wrapped spring-form pan into the large roasting/cake pan. Place it onto the middle shelf of your preheated oven. Pour the boiling water into the roasting pan so it rises only about an inch or less up the side of the wrapped cheesecake pan. Be very careful not to let any water get on the cheesecake batter.

Bake the cake for 70 - 80 minutes, or until it's just a little jiggly. (I would not, personally, bake this until "golden" on top as the original recipe states.) Let the cake cool in a somewhat warm and draft-free spot, for about one hour.


Run a very thin metal spatula or knife all around the outer edge of the crust. Then let the cake cool another hour at normal room temperature. Refrigerate it in the pan, lightly covered, several hours or overnight before removing the sides of the pan and slicing. 

To make the strawberry sauce:
In the bowl of your food processor, puree the strawberries until extremely smooth.

Place a fine mesh sieve over a medium size bowl and pour the puree into it, pushing it through the sieve with a spatula or spoon.


Mix in the sugar to taste (start with just a couple of tablespoons and add more as you prefer) and sprinkle in a few drops of lemon juice. Add in the quartered strawberry pieces and stir to combine. Let the sugar dissolve completely before using the sauce.


Serve on individual slices of the cheesecake. Be sure to keep the cheesecake, as well as the sauce, refrigerated.

(If you'd like to comment on this post, or to read any existing comments, please click on the purple COMMENTS below!)


Wednesday, April 13, 2011

NYC: Finally, I Bit the Big Apple! . . . (Black Bottom Cupcakes)


You know that concept of the bucket list? The list of things you feel you simply must do before you cash in your chips? Well, last week my list got slightly shorter. Finally, for the first time in my life, I visited New York City. Along with my husband and sons, we spent five days immersed in all it had to offer. Unequivocally, we had an extraordinary time. From the chaotic traffic, to the distinctive sounds and smells, to the beauty of the architecture and the diversity of the crowds, to all of the remarkable food, I must say I loved it.


What did we do? A better question might be what didn't we do. Of course, we had to visit the Statue of Liberty (and, as expected, she was glorious), just as we had to take in the view from the top of the Empire State Building, gawk at the neon spectacle of Times Square, and ponder the ice skaters at Rockefeller Center.


We strolled through Washington Square, paid our respects to Central Park, and swooned over the vibrant contents of MOMA's galleries. We managed to make two visits to the Strand  Bookstore--that historic catacomb of towering shelves, snugly packed with volumes of every description. We walked and walked and walked. Then we walked some more.


One afternoon, a quiet excursion into St. Patrick's Cathedral offered respite from the churning street for a few minutes and we lit a candle there for my late father in law, Grandpa Joe. With my husband as our chief orienteer, we negotiated the subway, marveling at the freedom it allows (what heaven it must be to be unencumbered with the need for a car).


And, of course, we sampled NYC's culinary wonders. From a shared slice of the Stage Deli's classic, gargantuan, and profoundly dense cheesecake, to Magnolia Bakery's moist and homey cupcakes vs. Crumbs Bake Shop's hefty jumbos, to Francois Payard's delicate French macarons (his beautiful little bakery in Soho is pictured just below), to bialys from Kossar's, the delights just kept presenting themselves.


We sipped fizzy chocolate egg creams while sharing a delicious knish in Eisenberg's Sandwich Shop. We compared the fluffiness of a slice of Lindy's cheesecake to the creaminess of a slice from Junior's Restaurant (Junior's won, in my opinion). If I had a dime for every steaming hot dog my husband and sons bought from street vendors throughout the week I could buy my own cart and set up shop on the next corner. From stem to stern, Manhattan lived up to its reputation as a foodie's paradise. We had great dinners at a lively Cuban restaurant, an Italian hideaway, and an upscale burger joint (appropriately named 5 Napkin Burger) that literally produced the best hamburger I've ever tasted.


All in all, it was a rich introduction to a city that I hope to visit again and again. What did I adore the most? Well, the Brooklyn Bridge was a huge highlight and something I would have been quite sad to miss. Late on Friday afternoon, the four of us walked across the bridge on its wide wooden foot/bike path, high above the traffic. (I think it's a remarkable thing that there is neither a fee to cross this iconic bridge nor a lurid gift shop at its entrance to exploit the pocketbooks of the tourists who flock to it like medieval pilgrims.)


My kids gaped with astonished amusement as I recited to them Hart Crane's famous poem about the bridge as we strode along. I know few poems by heart, but that's one of them. The meaning of its lines can be clear as mud, but the poem reads like music nonetheless. Here's my favorite one of the eleven stanzas:

Again the traffic lights that skim thy swift
Unfractioned idiom, immaculate sigh of stars,
Beading thy path--Condense eternity:
And we have seen night lifted in thine arms.

To me, that magical and shadowy image sums up not just the grace of the bridge, but the magnificence of this enormous city.


Clearly, I'm still processing the whole luscious adventure. And, having been absent from my kitchen for an entire week, I naturally felt the need to bake. Thus I present today's recipe from The Complete Magnolia Bakery Cookbook, by Allysa Torey and Jennifer Appel, which I came across in the Strand Bookstore and promptly purchased. Cookbooks often make the finest souvenirs, yes?


I needed to change this recipe just a smidgen, because I didn't have buttermilk on hand. In its place I used half a cup of plain Greek yogurt mixed with half a cup of 2 percent milk. Also, I decided to make 12 jumbo cupcakes vs. 18 regular size. And, I sprinkled a pinch of grated dark chocolate onto the top of each cupcake before they went in the oven. (Don't panic when your cupcakes sink in the middle as they begin to cool off. That's supposed to happen. It's part of their charm!)


Black Bottom Cupcakes
(For a printable version of this recipe click here!)

Preheat oven to 350 degrees. Line cupcake pans with paper liners for either 12 jumbos or 18 regulars.

For the cream cheese filling:
3/4 lb. full-fat cream cheese, not softened
1/2 cup granulated sugar
1 large egg, room temperature
1/3 cup mini semi-sweet chocolate chips

For the cupcake batter:
1 and 3/4 cups all-purpose flour
3/4 cup Dutch process cocoa
1 tsp. baking soda
1/4 tsp. salt (I used coarse kosher salt.)
1/2 cup vegetable oil (I used canola oil.)
1 cup granulated sugar
1/2 cup plain Greek yogurt mixed with 1/2 cup 2 percent milk (Or, use 1 cup buttermilk, as original recipe called for.)
2 tsp. vanilla extract

Garnish (optional):
3 Tbsp. finely grated dark chocolate


In a medium or large bowl of your mixer, using the paddle attachment, beat the cream cheese and sugar until smooth. Add in the egg and vanilla, and beat well to blend. Stir in the mini chocolate chips. Transfer this mixture to a small bowl and set aside. Clean the paddle attachment and the mixer bowl.

In a medium size bowl, whisk together the flour, cocoa powder, baking soda, and salt. Set aside. In the large bowl of your mixer, again using the paddle attachment, blend the oil and sugar on medium speed for a couple of minutes. In two parts, add in the dry ingredients alternately with the yogurt-milk and vanilla. Beat until well blended.

Using a portion scoop, if you have one, spoon the chocolate batter evenly into the paper-lined cups. Top evenly with the cream cheese filling. Sprinkle grated dark chocolate over each.
 
 
Bake for about 30 to 35 minutes, until a toothpick inserted comes out mostly clean. Use care not to over-bake them, or the edges will come out kind of dry (I think I over-baked mine by just a few minutes). Cool the cupcakes in the pans set on a rack for at least 15 minutes before removing them from the pan to finishing cooling on the rack.

Just like cheesecake, they taste best when they're not warm.


(If you'd like to comment on this post, or to read any existing comments, please click the purple COMMENTS below!)

Friday, April 1, 2011

Wildflower Honey Ice Cream . . . and Lemon Coriander Shortbread with Sunflower Seeds


"Flower" seems to be the operative word lately. The signs are everywhere. Daffodils rushing toward readiness,  dusky tulips shooting up against all odds, giant stalks of allium gaining height at a spectacular pace, tiny crocuses about to burst open in the grass. Not a thing is in bloom yet, but they're all working on it.


Today's recipes are in honor of those early spring flowers--the ones that make the effort to come back year after year. They let us know for certain, amidst lingering cold, that winter is truly behind us. And so, what better honey to employ in homemade ice cream than that borrowed from bees who consort with wildflowers? What better crunchy, salty item to blend into shortbread than roasted sunflower seeds?


About these recipes . . . 

If you often make homemade ice cream, you'll be unsurprised to see that this honey ice cream recipe is from David Lebovitz's spectacular book, The Perfect Scoop. I adapted it slightly from his formula for honey lavender ice cream. Though I do have culinary lavender on hand, and love it, I specifically wanted to use wildflower honey, and this honey's delicate flavor had to be unimpeded. Lavender's flavor is distinctive and it might have stolen the show. I was pretty pleased when I tasted this ice cream. One bite confirmed that omitting the lavender was the proper tactic. Wildflower honey is at the forefront here, no doubt about it.


The lemon coriander shortbread is based on Nancy Baggett's basic lemon shortbread recipe ("Iced Lemon Shortbread Fingers") from her indispensable classic, The All American Cookie Book. I adjusted Nancy's cookie by including ground coriander, salted sunflower seeds, and I opted not to use her lovely lemon icing. I also decided not to pat the dough into a 9"x9" pan as she suggests, but to roll it out to about a 1/4" thickness between parchment sheets. Then I chilled it in the freezer on a cookie sheet before cutting it, while still very firm, with cookie cutters. (That's my preferred method for dealing with cut-out cookies. It has saved my sanity time and again.)


Oh yes, about the coriander . . . At school, in the baking and pastry arts classes I've taken, we've often used herbs in non-savory recipes, so I already knew that ground coriander would blend seamlessly with the lemon. It sort of stands in the shadow of the  citrus, giving that tanginess an interesting, though subtle, boost. It's really not a weird combo at all.

Wildflower Honey Ice Cream and 
Lemon Coriander Shortbread with Sunflower Seeds

(For a printable version of these recipes, click here!)

Wildflower Honey Ice Cream
Yield: About one quart of ice cream, or slightly less.

1/2 cup wildflower honey
1 and 1/2 cups whole milk (I had no whole milk on hand so I used 1 and 1/4 cups 2 percent along with 1/4 cup of half-and-half.)
1/4 cup granulated sugar (I used pure cane sugar.)
One pinch of salt
1 and 1/2 cups heavy cream
Yolks from 5 large eggs

In a medium saucepan, stir together and warm up the milk, sugar, and salt.

Into a medium size bowl, pour the heavy cream. Mix the honey into the cream, stirring until it's completely blended. (If the honey is cold or too thick, you can warm it slightly in your microwave.) Set a fine mesh strainer over the bowl.

In another medium size bowl, whisk the egg yolks. Pour the warmed milk from the pan very slowly into the yolks, whisking constantly. Then, pour this whole mixture back into the saucepan.


Keep the saucepan over medium heat and stir constantly (and I mean constantly!), scraping the bottom and sides of the pan repeatedly. Cook only until the mixture starts to thicken. You'll know it's ready when you can dip a wooden spoon into the mixture and, when you pull it out, it's lightly coated. (If you cook too long, you'll end up with something as thick as pudding. Not good.)

Pour the mixture into the strainer that's sitting above the bowl of heavy cream. You can help push it through the strainer with your spoon. Stir together until completely blended.

Place the bowl over an ice bath (a larger bowl partially filled with ice and a little cold water) and let it cool, stirring periodically.


Cover the bowl with plastic wrap and put it in the fridge for several hours or overnight.

Process it in your ice cream freezer according to the manufacturer's directions. (I use the KitchenAid ice cream attachment that goes on my mixer, and whatever I'm making--ice cream, sorbet, frozen yogurt-- usually takes about 20 minutes to thicken, using only the first speed.)


Scrape the soft ice cream into a clean container, cover it securely, and freeze it for at least several hours until firm or, better yet, for at least one day.

* * * * 
Lemon Coriander Shortbread Cookies with Sunflower Seeds

Yield: About 2 to 3 dozen cookies, depending on size.

1 and 1/2 cups all-purpose flour (I used unbleached.)
1/3 cup cornstarch
2 tsp. ground coriander
1/2 cup powdered sugar
2 and 1/2 Tbsp. granulated sugar
Grated zest from one large lemon
3/4 cup unsalted butter, slightly softened and cut into big chunks
1/4 tsp. salt (I used coarse kosher.)
2 tsp. fresh lemon juice
1/2 tsp. lemon extract
3 Tbsp. roasted and salted sunflower seeds 


Line a cookie sheet with parchment. Have another sheet of parchment of the same size ready.

In a medium size mixing bowl, lightly whisk together the flour, cornstarch, and coriander.

In the large bowl of your food processor, process the powdered sugar, granulated sugar, and lemon zest for approximately three minutes.


Stop to scrape the bowl periodically. Add in the butter, salt, lemon juice, and lemon extract.


Process until fluffy and fully blended.


Add in the flour mixture and pulse until smooth and well combined. Stop to scrape the bowl as needed.


Put the dough into the bowl that held the flour, and using a flexible spatula, mix in the sunflower seeds.


Place the dough on top of one of the parchment sheets. Pat it into a rough rectangle and then cover it with the other sheet. Using a rolling pin, roll the dough out between the sheets to a thickness of approximately 1/4". Slide the dough, still between the sheets, onto a cookie sheet and place it in your freezer for about twenty minutes.

Preheat your oven to 300 degrees.

When the dough is very firm but not rock hard, take it out of the freezer and take it off the cookie sheet. Peel off the top piece of parchment and place that parchment sheet onto the cookie sheet.


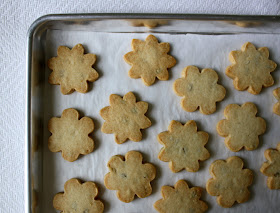
Leave the bottom sheet beneath the dough, and cut the dough into the desired shapes with cookie cutters. Place the cut-outs onto the parchment covered cookie sheet. The cookies will spread very little so they can be baked fairly close together. Bake for about 25 to 35 minutes, until just slightly golden brown.


Let them cool on the pan or on a rack.

(If you'd like to comment on this post, or to read any existing comments, please click on the purple COMMENTS below!)