
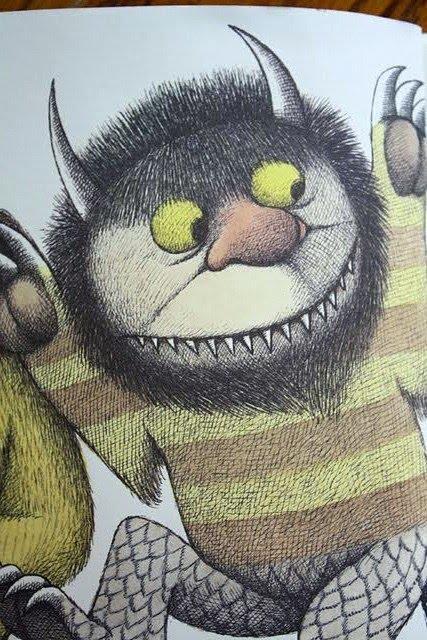
"The night Max wore his wolf suit and made mischief of one kind and another his mother called him 'WILD THING!' and Max said 'I'LL EAT YOU UP!' " -- Maurice Sendak, Where the Wild Things Are
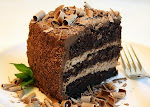
A few weeks ago, my good friend Holly asked if I'd be interested in making a special cake for her young nephew's birthday party. She sent me a link to a photo that depicted a fun rendition, in cake form, of one of the characters from Where the Wild Things Are. I took one look and knew I couldn't pass it up. That photo provided the direct inspiration for the cake that I ended up making last week. I hope the folks at Coco Cake, a boutique-cupcake bakery in Vancouver, Canada, agree that imitation is the sincerest form of flattery, because I drew very heavily from their adorable design (click on that link to see their cake!).

Their cake, though, was fondant covered and wrapped with a fabric ribbon. Because we didn't want to go with fondant for this little boy's birthday, my cake was filled and coated with buttercream, and fondant accents were used only for the eyes, nose, teeth, and horns. To make this cake, I used a devil's food recipe that can be found here, in a post that I did last September; the buttercream icing recipe that I used can also be found within that same post.


Here's the rundown on the supplies that I used and details on how I assembled this wild thing of a birthday cake:
Three 9" cake layers, cooled
About 1 and 1/2 cups of white or off-white buttercream icing
About 5 cups of chocolate icing
About 3/4 cup of grated milk chocolate and dark chocolate, combined
A small amount of white fondant (teeth and horns)
A small amount of pinkish/flesh-toned fondant (nose)
A very small amount of bright yellow fondant (eyes)
A very tiny amount of black fondant (pupils of eyes)
Helpful to have:
One 9" cakeboard
Cake decorating turntable
Metal offset spatula(s)
You'll definitely need:
One pastry bag (10" or 12" size is good)
One decorating tip -- number 133 or 233 (these are often referred to as "fur" or "grass" tips)
4 sharply-pointed standard length toothpicks (to help anchor the horns)
Black or dark gray food coloring (preferably paste or gel type; not the watery type)
Assembly:
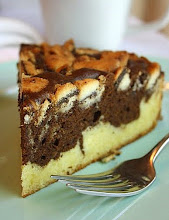
With one layer of the cake placed on the 9" cakeboard (note: "glue" the layer onto the board with about a tablespoon of smeared frosting on the board itself), and centered on your turntable, spread about 1 cup of the chocolate icing evenly to the edge of the layer; do the same with the second cake layer, spreading the icing evenly to the edge. Over the third layer, spread half of the white icing smoothly. Now, ice the sides of the cake all in chocolate, smoothing as you go; while the frosting is still soft, lift the cake on its board, and holding it on your palm over a sheet pan, pour and pat the grated chocolate onto the sides until the cake is coated all around. This grated chocolate gives the cake a nice furry look--very wild! Try hard to avoid getting grated chocolate on the top of the cake.

Refrigerate the cake, uncovered, for about 20 minutes or until the frosting on the top feels cold and firm. Once it's firm, spread another layer of white icing over the existing layer on the top of the cake. Smooth it completely with an offset spatula; if you're having trouble getting a really smooth surface, it helps to dip your spatula in very hot water for several seconds, immediately wipe it off with a dish towel, and then use it right away to smooth out the buttercream (they call this the "hot knife method"-- how clever!). Refrigerate the cake again, uncovered, while you prepare your fondant decorations.
When working with fondant, always remember that it begins to dry out extremely quickly, so don't leave it exposed to the air. Lightly cover your fondant pieces that are in progress with a slightly damp piece of paper towel while you're working, and only remove as much fondant from the container as you'll need for each decorative piece as you shape each one. (Keep your containers tightly closed and/or in zip-loc bags. You can buy small containers/packages of fondant at craft stores. They can be purchased already colored, or you can buy white fondant and color it yourself with paste food coloring; if you've never used fondant before at all, though, practice with it before you actually try it out on an important cake. It's kind of a weird medium and it takes getting used to. In fact, if you're a total newbie, I'd advise reading up on basic fondant techniques just to help avoid disaster.)

Working the pink/flesh-tone fondant with your hands until it's relatively soft, shape it into a rounded cone/pyramid shape, and work that gradually into the shape of the creature's nose. Don't forget that it needs one flat side to lay on the cake, and two indentations that look like nostrils. Keep in mind, as you mold the nose, the desired size in relation to the top of the cake.
To make the eyes, roll out the softened yellow fondant with a fondant rolling pin (a waxy, extremely smooth pin), and cut out two perfectly round eyes. Don't make them too thin, or they'll be hard to cleanly lift and handle. Roll out and cut two very thin circles for the pupils, and then trim them to fit into the eyes. Attach the black pupils to the eyes by dabbing on a tiny bit of water, with your finger or a brush, to act as glue; water is all that's needed to cement two small pieces of fondant together.
For the teeth, roll out a bit of the softened white fondant and. using a sharp knife or pastry wheel, cut out about 10 triangular teeth. (That wild creature really has 14 teeth in the storybook, but I could realistically only fit 10 of my fondant teeth on the cake.)
Take a larger chunk of the white fondant and roll it into a solid cone shape, then curve it slightly to make it look like the creature's horn; make 2 of these. At the base of each horn slice off a bit of the fondant on an angle with a thin sharp knife, to help create a small flat surface that will allow the horns to rest on, and better adhere to, the frosting on the cake. Let the horns sit for a while and firm up before attempting to affix them to the cake. Don't cover them.
Remove the cake from the fridge. Handling each fondant item carefully, arrange the eyes, nose, and teeth on the top of the cake, keeping in mind as you place them that frosting "fur" will eventually be piped all around the edge of the face.
When the horns seem firm enough, position them near the top edge of the cake above the outer edges of the eyes. Anchor each one, at its base, into the cake by pushing the two toothpicks through the horn and into the cake. (Critical: Be sure to inform the person who will be cutting the cake that the toothpicks are in there! No one wants a birthday child biting into a toothpick!) If there's any fear that the horns aren't ready to support themselves, place something beneath them to help hold them up while you continue decorating the cake. (As shown, I needed to use little boxes that I topped with folded napkins. That worked well, and once the whole cake was done being decorated and could go right into the fridge, I removed the supports and all was well.)

Prepare your pastry bag, using the fur/grass tip in a coupler (the coupler is the two-piece device that holds the tip securely inside and outside of the pastry bag). Using a small spatula or the back of a spoon, "stripe" the inside surface of the bag here and there with a smearing of the black/gray food coloring. Now fill the bag about 2/3 of the way full with soft chocolate frosting; it must be soft enough to pipe easily but not at all warm; if it's too soft the fur will just flop over and make a mess as you pipe it onto the cake.

Starting with the toothpick-anchored horns, pipe fur all around them; this will anchor them further.

Then, pipe the long bangs that extend to the top of the nose and eyes. From there, just keep piping fur all around, refilling your bag with more frosting as needed. Make the piping a little heavier near the creature's chin; in the book, he has a bit of a goatee if you look closely. Once you're all done piping, store the cake in a plastic cake carrier, or in a cake box, in the fridge.

There now, wasn't that wild?
(If you'd like to comment on this post, or to read existing comments, please click on the purple COMMENTS below!)


17 comments:
omg!! This is so clever! great job!
Are you kidding?!? This is so awesome! I love this and want to steal it. (By the way, I think I know Holly, and if so, say hey to her from Stefanie, Andrea's sister)
Wow, this is really cool! Great job!
This is sooo cute and so adorable!! I LOVE it!! I think you did an awesome job on this!
How cute! I read that book over and over to my kids- I know it by heart. You did a fantastic job with the Wild Thing!
That is perfectly wild.Love it!
What wonderful work you did.
What an amazing cake! Fantastic job. Well done. Not sure I'd be able to cut into it after all that work lol
Wow that looks fantastic! You're amazing
Jane, please open a bakery in my neighborhood. I promise to be your first customer! :o)
This cake is utterly amazing. This book has been a favorite in our house for years and years and I still like looking at it. It looks like the Wild Thing climbed directly out of the book onto the cake. Awesome!
Hey Jane, this is so awesome. I really admire that you took on this challenge. I would have been running for the hills... I'm not a good cake decorator or image re-creator, so something like this would really scare me.
I'm sure the birthday boy was thrilled-it looks great. Oh, and I would eat this by the way-smile!
Jane,
Incredible..fabulous cake and what a fantastic post to go with it-all the information needed for a do it yourself baker !! Thanks for sharing.
Sandy
My daughter is 25 and this is still her favorite book. Wonder cake. Great job!!
I have creativity envy in this moment! Soooo cool!
What fun!Your cake looks fantastic! Great work!
Fantastic cake, Jane. It looks better than your inspiration :)
It looks fantastic! Spot on.
Thanks Jane for posting such a comprehensive guide to decorating this fabulous cake! I just made it for my son's first birthday party and it was great! All thanks to you.
Post a Comment